Follow Me On Social Media!
If you’re tired of store-bought granola bars and looking to elevate your breakfast game, these homemade Cereal Bars are a game-changer. In just 5 minutes, you can whip up a batch of these delicious bars that will revolutionize your morning routine. The best part? The recipe is incredibly versatile, allowing you to use any cereal you have on hand – from classic Cheerios to indulgent Fruit Loops or wholesome granola.
During a recent visit from my nephew, I introduced him to these Cereal Bars, and he was blown away by how much tastier they were compared to the boxed variety. It’s truly magical how something as simple as a cereal bar can bring so much joy and excitement to snack time. Whether you’re a cereal aficionado or a breakfast traditionalist, these bars are sure to win you over with their convenience and delicious flavor combinations. Say goodbye to boring breakfasts and hello to a new family favorite with these delightful Cereal Bars.
Quick Benefits
- Quick and Easy: Takes only 5 minutes to prepare, perfect for busy mornings or snack times
- Versatile: Can be customized with any cereal and add-ins for endless flavor combinations
- Family Favorite: Loved by both kids and adults as a convenient grab-and-go breakfast or snack
- Wholesome and Portable: Provides a nutritious and satisfying option that can be stored for up to a week or frozen for longer-term enjoyment
Why You’ll Love This Delicious Homemade Cereal Bars Recipe Recipe
- Quick and Easy: Takes just 5 minutes to prepare, perfect for busy mornings or snack time.
- Customizable: Use any cereal of your choice, from classic options like Cheerios to indulgent ones like Fruit Loops.
- Kid-Friendly: Even picky eaters love these bars; a great way to get kids involved in the kitchen.
- Portable: Ideal for on-the-go breakfasts, lunchboxes, or post-workout snacks.
- Versatile: Experiment with different flavor combinations and add-ins to suit your taste preferences.
- Wholesome Ingredients: Made with simple, pantry staples like peanut butter, agave, and protein powder.
- Family Favorite: A recipe that has become a beloved tradition in many households, enjoyed by both kids and adults alike.
Ingredients for Delicious Homemade Cereal Bars Recipe
For the Cereal Bars
- 3 tbsp protein powder (optional)
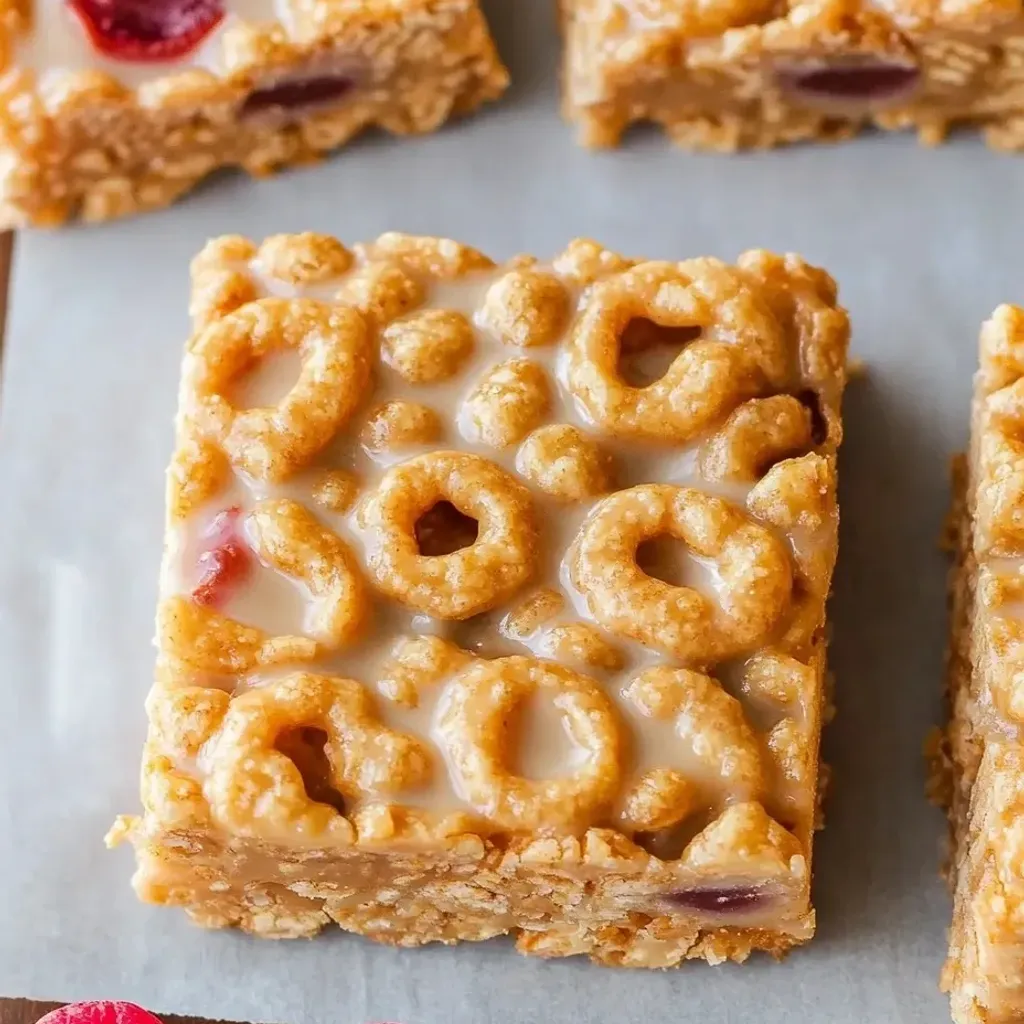
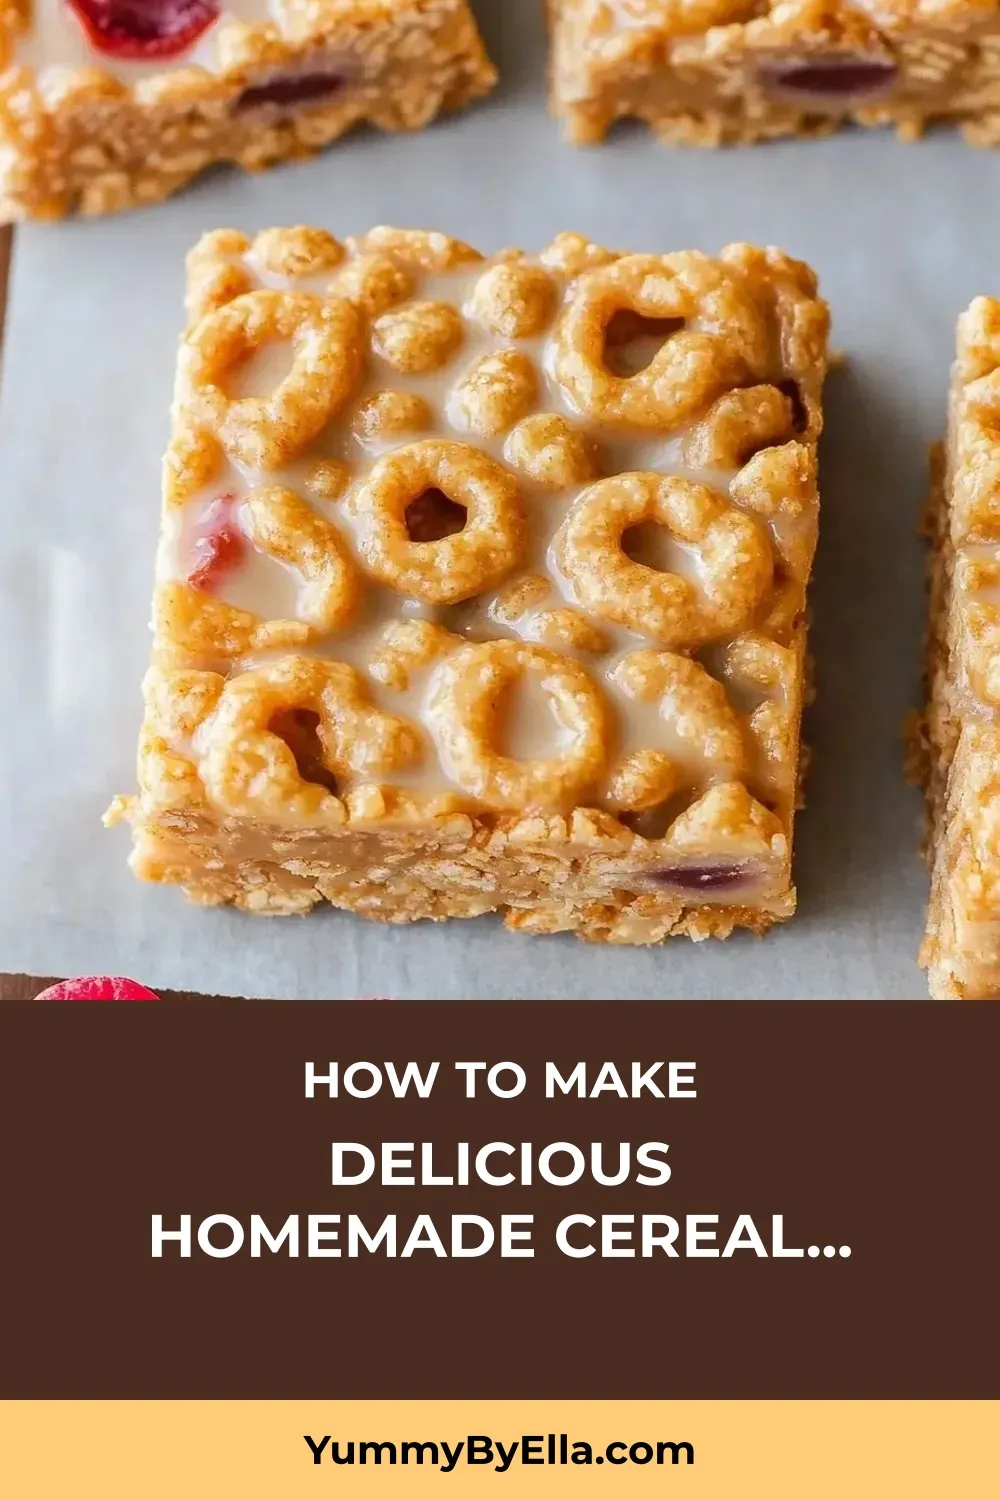
- 3 cups cereal of choice
- 1/2 tsp salt (optional)
- 2/3 cup peanut butter or nut butter of choice
- 1/2 cup agave, honey, or brown rice syrup
How to Make Delicious Homemade Cereal Bars Recipe
Step 1: Prepare the pan
Prepare an 8-inch square pan by lining it with wax or parchment paper. For a larger batch, double the recipe and use a 9×13-inch pan instead.
Step 2: Prepare the nut butter
If necessary, gently heat the nut butter until it is easy to stir, ensuring it mixes well with the other ingredients.
Step 3: Mix ingredients
Combine cereal, nut butter, sweetener (agave, honey, or brown rice syrup), salt (optional), and protein powder (optional) in a large bowl, stirring until mixed.
Step 4: Form the bars
Transfer the cereal mixture into the lined pan. Cover with a second sheet of parchment paper and firmly press down to compact the mixture, ensuring the cereal bars hold together when cut.
Step 5: Chill and set
Chill the pan in the freezer for approximately 30 minutes or until the mixture sets and can be cut into bars.
📌 Pin for later!
Step 6: Cut and store
After the mixture has set, lift it out of the pan using the parchment paper edges and cut it into 9 bars. Store any remaining bars in an airtight container in the refrigerator, freezer, or at room temperature.
Storage Tips
To store the finished cereal bars, it is essential to keep them in an airtight container to maintain their freshness and prevent them from becoming stale. If you are in a warm climate or during the summer months, it is recommended to store the bars in the refrigerator to prevent the nut butter from softening too much. Wrapping individual bars in parchment paper or reusable food wraps is a convenient way to grab them for on-the-go snacks or to pack in lunchboxes. For longer storage, place the wrapped bars in a freezer container where they can be stored for an extended period. When ready to eat, simply thaw the bars at room temperature for about 20 minutes.
As a versatile and customizable snack, these homemade cereal bars can be transformed by incorporating various add-ins and flavor combinations to suit your taste preferences. Experimenting with different cereals and nut butters can yield unique and delicious results. Whether enjoyed as a quick breakfast option or a satisfying snack, these cereal bars offer a convenient and wholesome treat that can be enjoyed by the whole family. Embrace the simplicity and flexibility of this recipe to create your own signature combinations and make these bars a staple in your kitchen for busy mornings or anytime you need a delicious pick-me-up.
Ingredient Substitutions
If you want to make these cereal bars without peanut butter or nut butter, you can substitute with sunflower seed butter, tahini, or even coconut butter for a different flavor profile. These alternatives can provide the necessary binding and moisture to hold the bars together.
For a vegan version of the cereal bars, you can replace honey with maple syrup or agave nectar. These sweeteners work well in providing the necessary stickiness to bind the ingredients together. Additionally, if you prefer a less sweet option, you can use unsweetened applesauce as a substitute for the sweetener, adjusting the quantity based on your taste preferences.
When it comes to the cereal component, feel free to mix and match different types of cereals based on what you have available. You can use a combination of oats, crispy rice cereal, bran flakes, or even crushed pretzels for added texture and flavor. Experimenting with different cereals can create unique variations of these cereal bars that cater to your preferences and pantry staples.
Serving Suggestions
For a fun twist on these homemade cereal bars, try making them in mini muffin tins for bite-sized treats that are perfect for snacking or packing in lunchboxes. Simply press the mixture firmly into greased mini muffin cups and refrigerate until set. Pop them out and enjoy these adorable mini cereal bar bites!
Another creative serving suggestion is to crumble the cereal bars over a bowl of yogurt or ice cream for a crunchy and flavorful topping. The combination of the chewy bars with the creamy base creates a delightful contrast in texture and flavor that will elevate your dessert game. Try different cereal bar flavors to find your favorite pairing with yogurt or ice cream!
FAQs for Delicious Homemade Cereal Bars Recipe
Can I use any type of cereal for this recipe?
Yes, the beauty of this cereal bar recipe lies in its flexibility. You can use any cereal of your choice, whether it’s classic Cheerios, crunchy granola, or even colorful Fruit Loops for a fun twist.
How long do these homemade cereal bars stay fresh?
When stored in an airtight container, these cereal bars maintain their quality for about a week. In warmer weather, it’s best to refrigerate them to prevent the nut butter from becoming too soft.
What can I do if my cereal bars are crumbly?
If your cereal bars are crumbly, it may be because they weren’t pressed firmly enough. Make sure to press the mixture firmly into the pan before chilling. Additionally, heavier cereals like granola may require a bit more nut butter to hold them together properly.
Can I freeze these homemade cereal bars for longer storage?
Yes, you can freeze these cereal bars for longer storage. Simply wrap them individually in parchment paper or reusable food wraps, then place them in a freezer container. They thaw in about 20 minutes at room temperature when you’re ready to enjoy them.
Conclusion
As you wrap up your cereal bar-making adventures, remember that the true joy of this recipe lies in its adaptability and the smiles it brings to those who get to enjoy them. Embrace the process of tweaking ingredients and flavors to create your own signature cereal bar masterpiece. Whether you prefer classic Cheerios or colorful Fruit Loops, these bars are a canvas for your creativity and a delicious way to start the day.
So the next time you’re in need of a quick breakfast or snack option, reach for these homemade cereal bars. Share them with your family, friends, and even the skeptics – you might just convert them into cereal bar enthusiasts too. With a batch of these bars on hand, you’ll be ready to tackle whatever the day brings with a nutritious and tasty treat by your side. Happy snacking, and enjoy your homemade Cereal Bars!
📌 Pin for later!
Delicious Homemade Cereal Bars Recipe
“Transform your morning routine with these quick and versatile homemade cereal bars that cater to all taste preferences and make the perfect grab-and-go breakfast or snack.”
Prep Time5 Minutes
Cook Time~ undefined
Total Time5 Minutes
CuisineAmerican
Skill LevelEasy
Servings9 Servings (9 cereal bars)
Ingredients
For the Cereal Bars
- 3 tbsp protein powder (optional)
- 3 cups cereal of choice
- 1/2 tsp salt (optional)
- 2/3 cup peanut butter or nut butter of choice
- 1/2 cup agave, honey, or brown rice syrup
Instructions
-
Prepare the pan: Prepare an 8-inch square pan by lining it with wax or parchment paper. For a larger batch, double the recipe and use a 9×13-inch pan instead.
-
Prepare the nut butter: If necessary, gently heat the nut butter until it is easy to stir, ensuring it mixes well with the other ingredients.
-
Mix ingredients: Combine cereal, nut butter, sweetener (agave, honey, or brown rice syrup), salt (optional), and protein powder (optional) in a large bowl, stirring until mixed.
-
Form the bars: Transfer the cereal mixture into the lined pan. Cover with a second sheet of parchment paper and firmly press down to compact the mixture, ensuring the cereal bars hold together when cut.
-
Chill and set: Chill the pan in the freezer for approximately 30 minutes or until the mixture sets and can be cut into bars.
-
Cut and store: After the mixture has set, lift it out of the pan using the parchment paper edges and cut it into 9 bars. Store any remaining bars in an airtight container in the refrigerator, freezer, or at room temperature.