Follow Me On Social Media!
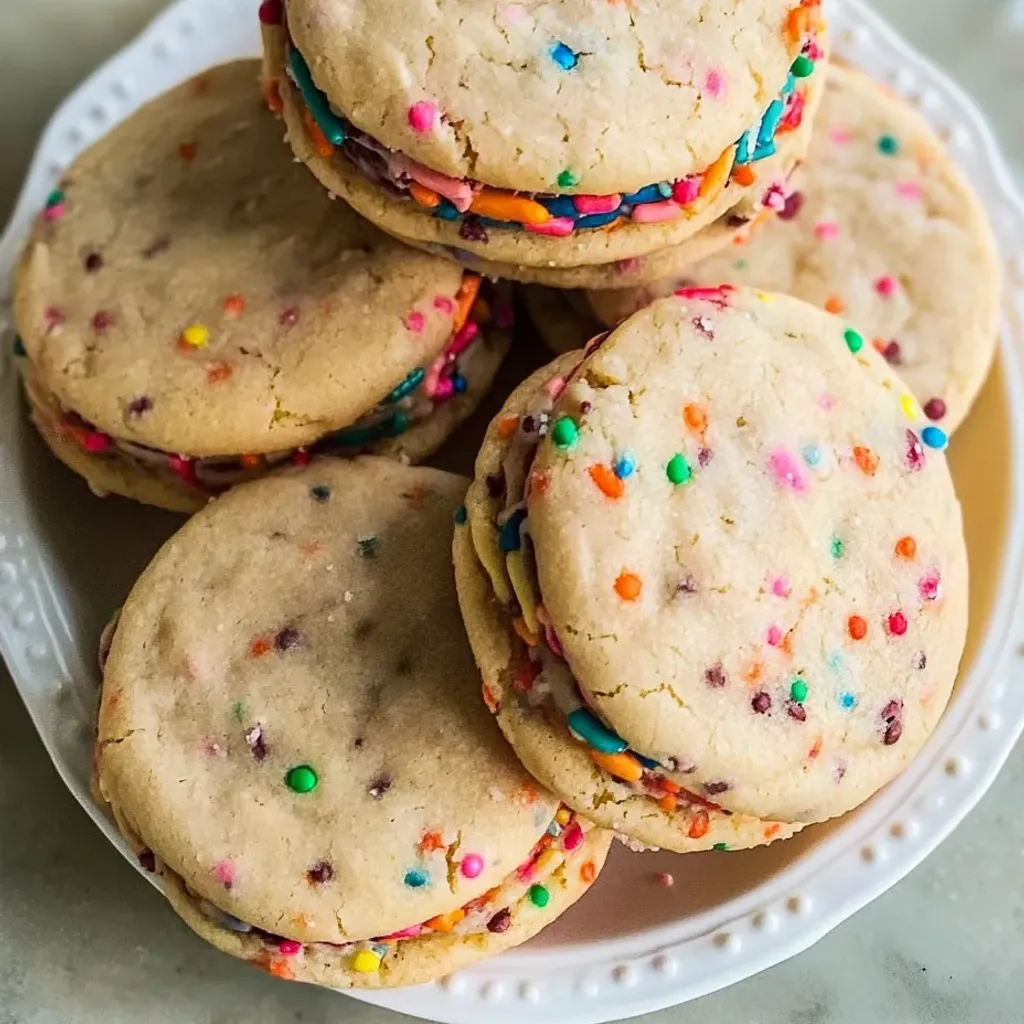
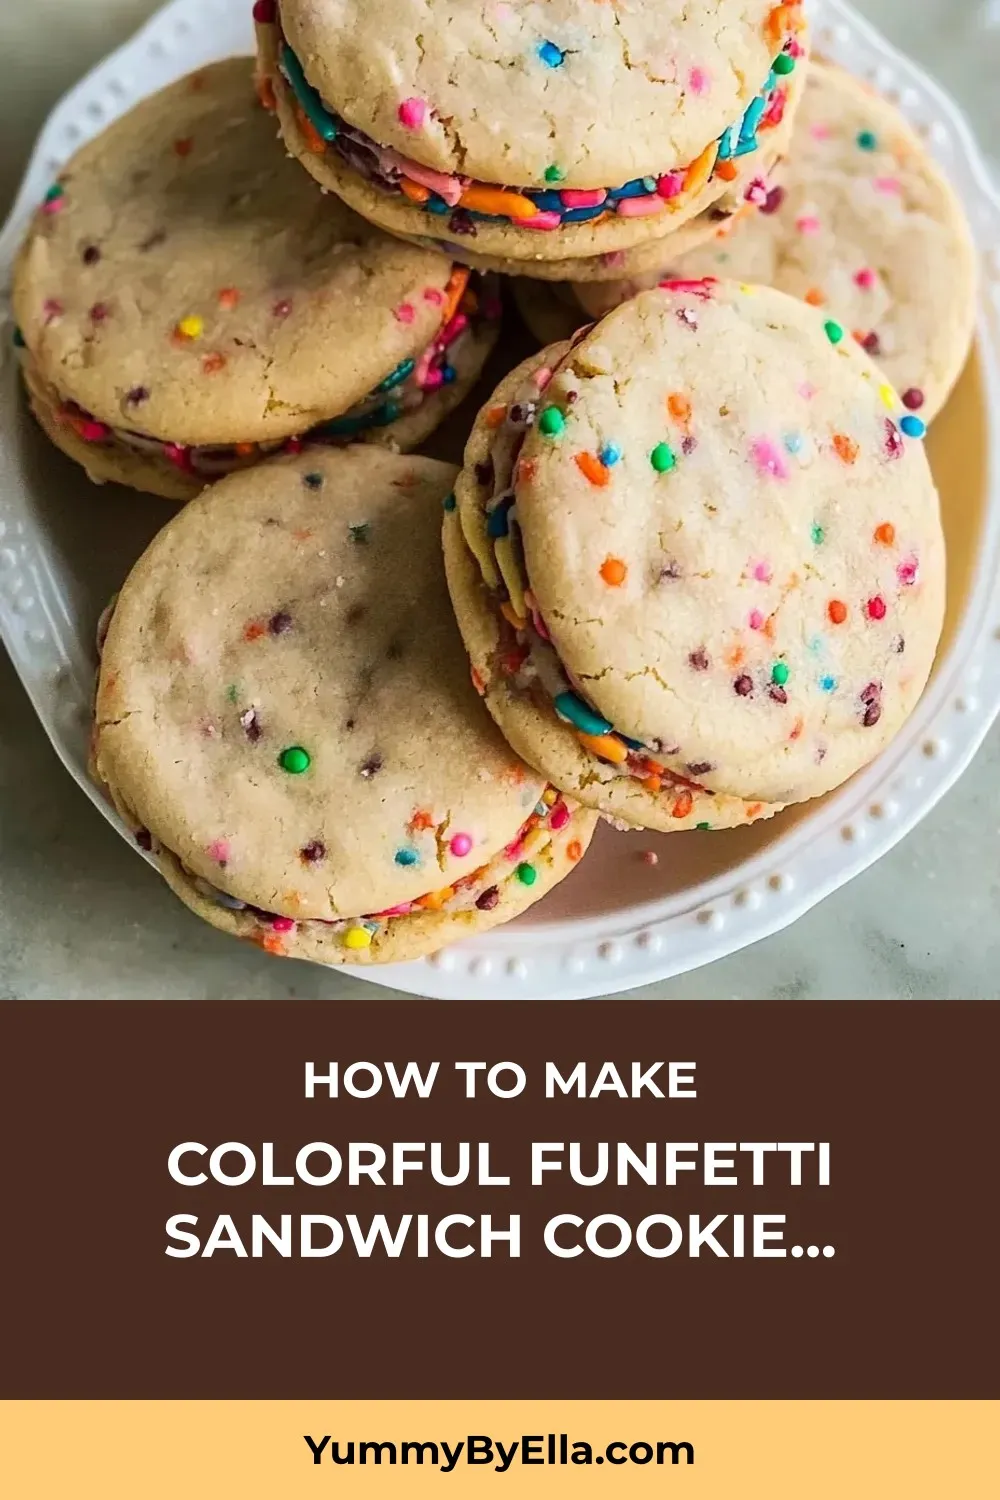
Looking to add a touch of whimsy and delight to your next celebration? Look no further than these delectable Funfetti Sandwich Cookies! I crafted this recipe for my niece’s birthday bash, and since then, they’ve been a hit at every gathering. Picture this – buttery, almond-infused sugar cookies bursting with colorful sprinkles, lovingly embracing a luscious cream cheese frosting center. The result? Pure cookie magic that brings smiles and joy to all who indulge.
I still remember the moment at my friend’s housewarming when a tiny guest declared these Funfetti Sandwich Cookies as “the best cookies in the universe.” The sheer delight in her eyes was priceless! These cookies have a way of enchanting both young and old alike, earning them the title of a universal favorite treat. And while they may seem like a fancy bakery creation, fear not – the recipe is surprisingly approachable, with just the right balance of flavors and textures to make every bite a celebration in itself. So, gather your sprinkles and get ready to bake up some happiness!
Quick Benefits
- Perfect balance of flavors and textures with buttery almond cookies and tangy cream cheese frosting
- Versatile and customizable for any occasion with themed sprinkle colors and flavored variations
- Can be made ahead and stored for up to five days in the refrigerator or frozen for up to three months
- Accessible recipe suitable for bakers of all levels, delivering impressive results for celebrations
Why You’ll Love This Colorful Funfetti Sandwich Cookies for a Festive Treat Recipe
- Delicious Flavor Combination: The buttery cookies with almond undertones paired with tangy cream cheese frosting create a perfect balance of flavors that will leave you craving more.
- Festive and Joyful Appearance: The colorful sprinkles add a fun and festive touch, making these cookies perfect for birthdays, holidays, or any celebration.
- Kid-Approved: Children and adults alike will love these cookies, as evidenced by the enthusiastic reactions from kids at parties and gatherings.
- Versatile and Customizable: The recipe offers various creative variations, from changing up the sprinkle colors to adding citrus zest or chocolate chips, allowing you to customize the cookies to suit different occasions and preferences.
- Make-Ahead Convenience: These cookies can be stored in the refrigerator for up to five days or frozen for up to three months, making them a convenient make-ahead dessert option for busy schedules or planned events.
- Perfect for Gifting: Pack these cookies in a decorative tin with parchment paper between layers for a beautiful and delicious homemade gift that will surely be appreciated.
- Accessible Recipe: Despite their impressive appearance, these cookies are straightforward to make, making them suitable for bakers of all skill levels. The chilling and assembly time are well worth the effort for the delightful reactions you’ll receive when sharing these treats.
Ingredients for Colorful Funfetti Sandwich Cookies for a Festive Treat
For the Funfetti Sugar Cookies
- 1 large egg (57g), room temperature
- ⅓ cup sprinkles
- ¾ cup (170g) unsalted butter, room temperature
- 1 ½ cups (180g) all-purpose flour
- ¼ tsp baking powder
- ½ cup (100g) granulated sugar
- 1 tsp (5ml) clear vanilla extract (or regular vanilla extract)
- ⅓ cup (30g) almond flour (can substitute with ¼ cup all-purpose flour)
- ¼ tsp almond extract (optional)
- ¼ tsp salt
For the Cream Cheese Frosting
- 1 tsp (5ml) clear vanilla extract (or regular vanilla extract)
- ½ tsp salt
- 2 cups (150g) powdered sugar or confectioners sugar, sifted
- 1-2 tbsp (15-30ml) milk
- ½ cup (113g) unsalted butter, room temperature
- 4 oz (112g) cream cheese, room temperature
How to Make Colorful Funfetti Sandwich Cookies for a Festive Treat
Step 1: Prepare the dry ingredients
Combine the all-purpose flour, almond flour, baking powder, and salt by sifting and whisking together until fully mixed. Set aside.
Step 2: Cream butter and sugar
In a large mixing bowl, cream together the butter and sugar on medium-high speed for 2-3 minutes until well combined. Scrape the sides of the bowl.
Step 3: Add wet ingredients
Add the egg, vanilla extract, and almond extract (if using) to the mixture while mixing on low speed until each is fully incorporated before adding the next, approximately 20-30 seconds. Scrape down the sides and bottom of the bowl. Beat on medium speed for 30 seconds to ensure thorough mixing.
Step 4: Combine dry and wet ingredients
Combine half of the dry ingredients with the wet ingredients on low speed until just mixed. Scrape down the bowl. Add the rest of the dry ingredients, then gently fold in sprinkles until almost combined.
Step 5: Adjust dough consistency if needed
If the dough is too sticky, add additional flour, 1 tablespoon at a time, up to 2-3 tablespoons, until the dough is tacky but not overly sticky.
Step 6: Prepare dough for chilling
Place the dough on a large sheet of parchment paper. Divide it into two equal pieces using a bowl scraper or your hands. Set one piece aside. Cover one piece of dough with plastic wrap and roll it out to a ¼ inch thickness. Shape is not important, focus on thickness.
Step 7: Wrap and chill dough
After rolling out the dough, wrap it completely in the plastic wrap that was used for rolling. Transfer the wrapped dough to a baking sheet or large plate lined with parchment paper. Repeat this process with the remaining dough. Chill the wrapped cookie dough sheets in the refrigerator for a minimum of 2 hours or overnight.
Step 8: Prepare for baking
Preheat the oven to 350°F (175°C) and line two large baking sheets with parchment paper.
Step 9: Cut out cookies
Take out a chilled dough sheet and place it on a piece of parchment paper. In a small bowl, put ¼ cup of flour for coating the cookie cutter. Coat the cookie cutter with flour and cut out shapes from the chilled dough. Repeat until all the dough is used. Gather leftover dough, shape it into a ball using plastic wrap, and save it for rolling out later.
Step 10: Place cookies on baking sheet
Transfer the cut dough pieces onto a baking sheet lined with parchment paper, ensuring they are spaced about 2 inches apart. If the dough becomes too warm and the cookies become misshapen, place them in the freezer for approximately 10 minutes to firm up.
Step 11: Bake cookies
Bake cookies at 350°F for 8-12 minutes until edges are light golden brown. Centers may be slightly undercooked. Remove from oven and cool on hot baking sheet on a rack for 3 minutes.
Step 12: Cool cookies
Place cookies on a cooling rack to cool entirely for a minimum of 45 minutes. Baking time will vary based on cookie size; for 2-inch cookies made with chilled dough, bake for 8-10 minutes.
Step 13: Repeat with remaining dough
Continue the process of rolling, cutting, baking, and cooling with the remaining dough.
Step 14: Make cream cheese frosting
In a mixing bowl, cream together room temperature butter and cream cheese until smooth. Gradually add powdered sugar, beating well after each addition. Mix in vanilla extract, milk, and salt until frosting reaches desired consistency. If too thick, add more milk as needed.
Step 15: Assemble sandwich cookies
Spread frosting on the bottom of one cookie, then press another cookie on top to form a sandwich.
📌 Pin for later!
Storage Tips
After making a batch of these delightful funfetti sandwich cookies, you’ll want to store them properly to maintain their texture and flavors. To keep them fresh and delicious, store the assembled cookies in an airtight container in the refrigerator. These cookies will retain their perfect texture for up to five days in the fridge. Interestingly, the flavors of the cookies actually develop and meld overnight, enhancing their taste, so they might even taste better the next day.
If you have leftovers or want to store them for a longer period, you can freeze the assembled funfetti sandwich cookies for up to three months. When you’re ready to enjoy them, simply thaw the cookies in the refrigerator for a few hours before serving. Alternatively, you can freeze the unfrosted cookies and then thaw and assemble them when needed. This storage method allows you to enjoy these delightful cookies at a later date without compromising their taste or texture.
Ingredient Substitutions
For the Funfetti Sandwich Cookies, there are a few ingredient substitutions you can consider based on personal preferences or dietary restrictions. If you don’t have almond flour on hand or prefer not to use it, you can replace it with an equal amount of all-purpose flour. This substitution will still yield delicious cookies with a slightly different texture but will maintain the overall flavor profile of the recipe.
If you want to make the cookies more colorful or match a specific theme for an event, you can swap out the traditional rainbow sprinkles for themed or colored sprinkles. This simple substitution allows you to customize the cookies for different occasions, such as using red and green sprinkles for Christmas, pastel colors for baby showers, or team colors for sports events. The sprinkle colors can add a fun and festive touch to the cookies, making them even more visually appealing and suitable for various celebrations.
Additionally, if you prefer a different flavor profile for the frosting, you can experiment with different extracts or additions. For example, you can omit the almond extract or try adding different extracts like lemon, orange, or peppermint to the frosting for unique flavor variations. These adjustments can add a refreshing citrusy twist or a festive holiday flavor to the cookies, allowing you to customize the recipe to suit your taste preferences or the theme of the event.
Serving Suggestions
For a fun and whimsical presentation, try serving these delightful funfetti sandwich cookies on a tiered cake stand at your next celebration. The colorful sprinkle-studded cookies will look even more festive and inviting when displayed in layers, making them a standout dessert that will surely impress your guests. You can even customize the sprinkle colors to match the theme of your event, whether it’s red and green for Christmas, pastels for baby showers, or team colors for sports parties.
To take these funfetti sandwich cookies to the next level, consider turning them into a unique ice cream treat. Instead of frosting, sandwich a small scoop of vanilla ice cream between two cookies for a delightful and refreshing twist. This creative variation adds a new dimension to the classic cookie recipe, offering a fun and delicious dessert option that will have your guests coming back for more.
FAQs for Colorful Funfetti Sandwich Cookies for a Festive Treat
Question?
Can I use regular vanilla extract instead of clear vanilla extract in this recipe?
Question?
How long can I store these funfetti sandwich cookies, and what is the best way to store them?
Question?
Can I make these cookies ahead of time for an event? If so, what is the best way to prepare them in advance?
Question?
Are there any creative variations I can try with these funfetti sandwich cookies?
Conclusion
In conclusion, these Funfetti Sandwich Cookies are truly a delightful treat that never fails to bring smiles and joy to any gathering. The combination of buttery cookies and creamy frosting, speckled with colorful sprinkles, creates a magical experience that will have your guests coming back for more. Whether you’re celebrating a special occasion or simply craving a sweet pick-me-up, these cookies are sure to impress and satisfy.
So go ahead, gather your ingredients, follow the simple steps, and indulge in the sweetness of these Funfetti Sandwich Cookies. Let your creativity shine by customizing them for different events and seasons, and watch as they become a beloved staple in your baking repertoire. Remember, the time and effort you put into making these cookies will be rewarded with smiles, laughter, and the pure delight of enjoying a delicious homemade treat. Happy baking, and enjoy your Funfetti Sandwich Cookies!
📌 Pin for later!
Colorful Funfetti Sandwich Cookies for a Festive Treat
“Funfetti Sandwich Cookies: Butter cookies filled with cream cheese frosting and colorful sprinkles, a festive treat loved by kids and adults alike.”
Prep Time30 Minutes
Cook Time10 Minutes
Total Time40 Minutes
CuisineAmerican
Skill LevelEasy
Servings12 Servings (12 sandwich cookies)
Ingredients
For the Funfetti Sugar Cookies
- 1 large egg (57g), room temperature
- ⅓ cup sprinkles
- ¾ cup (170g) unsalted butter, room temperature
- 1 ½ cups (180g) all-purpose flour
- ¼ tsp baking powder
- ½ cup (100g) granulated sugar
- 1 tsp (5ml) clear vanilla extract (or regular vanilla extract)
- ⅓ cup (30g) almond flour (can substitute with ¼ cup all-purpose flour)
- ¼ tsp almond extract (optional)
- ¼ tsp salt
For the Cream Cheese Frosting
- 1 tsp (5ml) clear vanilla extract (or regular vanilla extract)
- ½ tsp salt
- 2 cups (150g) powdered sugar or confectioners sugar, sifted
- 1-2 tbsp (15-30ml) milk
- ½ cup (113g) unsalted butter, room temperature
- 4 oz (112g) cream cheese, room temperature
Instructions
-
Prepare the dry ingredients: Combine the all-purpose flour, almond flour, baking powder, and salt by sifting and whisking together until fully mixed. Set aside.
-
Cream butter and sugar: In a large mixing bowl, cream together the butter and sugar on medium-high speed for 2-3 minutes until well combined. Scrape the sides of the bowl.
-
Add wet ingredients: Add the egg, vanilla extract, and almond extract (if using) to the mixture while mixing on low speed until each is fully incorporated before adding the next, approximately 20-30 seconds. Scrape down the sides and bottom of the bowl. Beat on medium speed for 30 seconds to ensure thorough mixing.
-
Combine dry and wet ingredients: Combine half of the dry ingredients with the wet ingredients on low speed until just mixed. Scrape down the bowl. Add the rest of the dry ingredients, then gently fold in sprinkles until almost combined.
-
Adjust dough consistency if needed: If the dough is too sticky, add additional flour, 1 tablespoon at a time, up to 2-3 tablespoons, until the dough is tacky but not overly sticky.
-
Prepare dough for chilling: Place the dough on a large sheet of parchment paper. Divide it into two equal pieces using a bowl scraper or your hands. Set one piece aside. Cover one piece of dough with plastic wrap and roll it out to a ¼ inch thickness. Shape is not important, focus on thickness.
-
Wrap and chill dough: After rolling out the dough, wrap it completely in the plastic wrap that was used for rolling. Transfer the wrapped dough to a baking sheet or large plate lined with parchment paper. Repeat this process with the remaining dough. Chill the wrapped cookie dough sheets in the refrigerator for a minimum of 2 hours or overnight.
-
Prepare for baking: Preheat the oven to 350°F (175°C) and line two large baking sheets with parchment paper.
-
Cut out cookies: Take out a chilled dough sheet and place it on a piece of parchment paper. In a small bowl, put ¼ cup of flour for coating the cookie cutter. Coat the cookie cutter with flour and cut out shapes from the chilled dough. Repeat until all the dough is used. Gather leftover dough, shape it into a ball using plastic wrap, and save it for rolling out later.
-
Place cookies on baking sheet: Transfer the cut dough pieces onto a baking sheet lined with parchment paper, ensuring they are spaced about 2 inches apart. If the dough becomes too warm and the cookies become misshapen, place them in the freezer for approximately 10 minutes to firm up.
-
Bake cookies: Bake cookies at 350°F for 8-12 minutes until edges are light golden brown. Centers may be slightly undercooked. Remove from oven and cool on hot baking sheet on a rack for 3 minutes.
-
Cool cookies: Place cookies on a cooling rack to cool entirely for a minimum of 45 minutes. Baking time will vary based on cookie size; for 2-inch cookies made with chilled dough, bake for 8-10 minutes.
-
Repeat with remaining dough: Continue the process of rolling, cutting, baking, and cooling with the remaining dough.
-
Make cream cheese frosting: In a mixing bowl, cream together room temperature butter and cream cheese until smooth. Gradually add powdered sugar, beating well after each addition. Mix in vanilla extract, milk, and salt until frosting reaches desired consistency. If too thick, add more milk as needed.
-
Assemble sandwich cookies: Spread frosting on the bottom of one cookie, then press another cookie on top to form a sandwich.