Follow Me On Social Media!
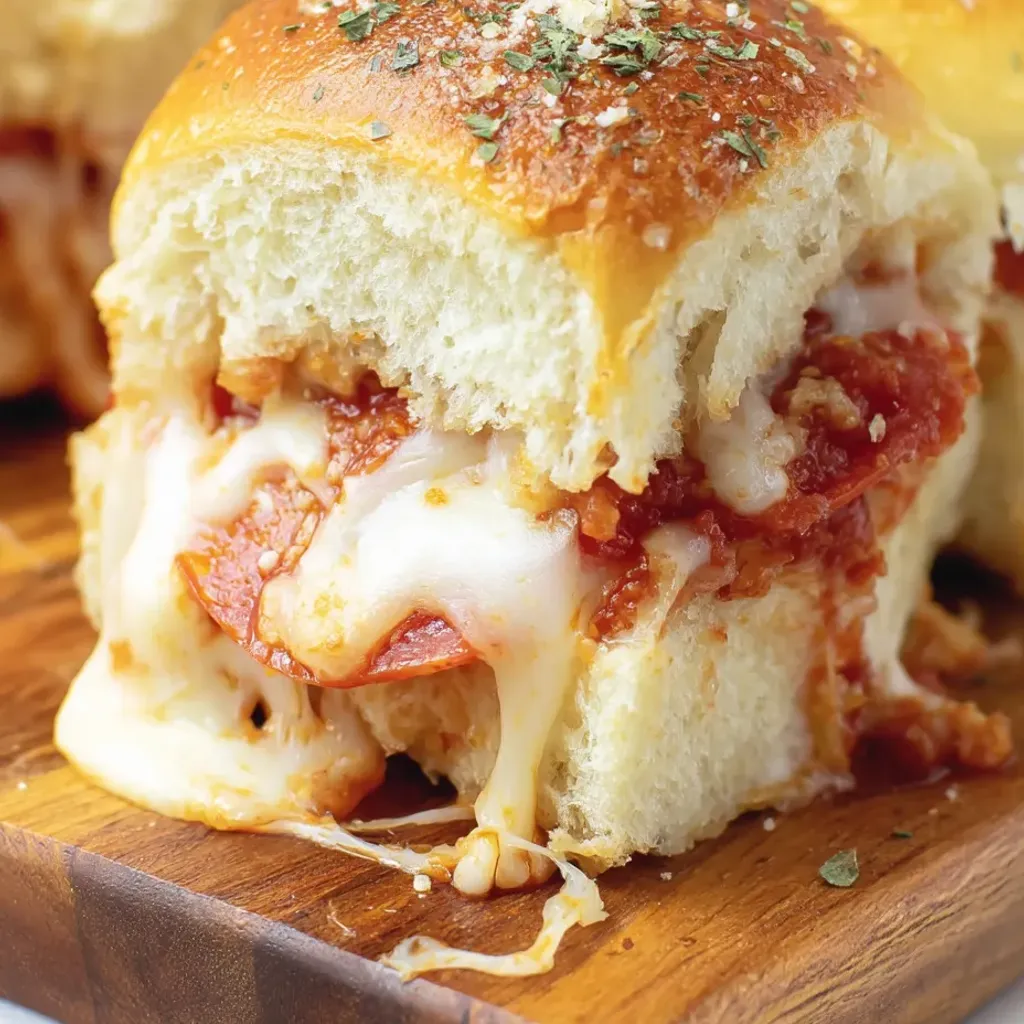
Looking for a crowd-pleasing snack or meal that’s sure to disappear in minutes? Look no further than these scrumptious Pizza Sliders! Perfect for feeding a hungry group with minimal effort, these Hawaiian roll sandwiches are loaded with gooey mozzarella, zesty pizza sauce, and savory pepperoni, all baked to golden perfection. The secret? A generous sprinkle of garlic butter on top that adds a touch of irresistible flavor.
I discovered the magic of Pizza Sliders during one of my son’s sleepovers, where they were a hit with his friends and even impressed my neighbor, who now swears by them for her gatherings. The trick to keeping these sliders a crowd favorite lies in layering the ingredients just right – starting with a protective blanket of cheese that ensures the rolls stay soft and delicious, never soggy. Whether it’s a game day party, a casual dinner, or just a weeknight craving for something special, these sliders are guaranteed to brighten any occasion.
Feel free to customize your Pizza Sliders with your favorite toppings, from different meats to a colorful array of veggies. They can even be prepped ahead of time, making them a convenient option for busy days. So, why settle for ordinary pizza when you can enjoy the same delicious flavors in a fun and easy-to-eat slider form? Give these Pizza Sliders a try and get ready to watch them vanish before your eyes!
Quick Benefits
- Perfect bite-sized version of pizza that disappears quickly
- Soft, sweet Hawaiian rolls complement savory pizza flavors well
- Easy to customize with different ingredients like sausage, ham, or vegetables
- Can be assembled ahead of time and refrigerated for convenience
Why You’ll Love This Cheesy Pizza Sliders – Easy & Delicious Recipe Recipe
- Convenient Party Food: Perfect for feeding a crowd, especially during game day parties, school events, and potlucks – they disappear quickly!
- Kid-Friendly: Ideal for picky eaters or serving at sleepovers – a hit with children and adults alike.
- Customizable: Easily swap out ingredients to cater to different tastes – try different meats, cheeses, or make vegetarian versions with veggies.
- Make-Ahead: Prep in advance and bake when ready – great for planning ahead for busy days or entertaining.
- Versatile: Serve for casual dinners, weeknight meals, or special occasions – a fun twist on traditional pizza that feels special.
- Crowd-Pleasing: Loved by neighbors, friends, book club members – a recipe that impresses without causing stress.
- Tips and Tricks: Learn from the author’s experiences – like layering cheese first to prevent sogginess, making the process foolproof.
- Comfort Food Reinvented: Enjoy all the flavors of pizza in a convenient, bite-sized form that’s easy to serve and eat.
- Reheatable: Leftovers can be stored and reheated, maintaining the delicious flavors and textures for a few days.
- Simplicity and Flavor: A recipe that requires minimal effort but yields maximum flavor and enjoyment – a go-to recipe for happy gatherings and quick meals.
Ingredients for Cheesy Pizza Sliders – Easy & Delicious Recipe
Main Components
- 20 slices deli style dry cured pepperoni
- 12 count package Hawaiian rolls
- 2½ cups shredded mozzarella, divided (1 cup and 1¼ cups)
- ¾ cup pizza sauce
Topping
- 1 teaspoon dried Italian seasoning
- 2 tablespoons grated Parmesan
- ⅓ cup salted sweet cream butter, melted
How to Make Cheesy Pizza Sliders – Easy & Delicious Recipe
Step 1: Prep oven and dish
Preheat oven to 375°F and lightly coat a 9×13 baking dish with nonstick spray.
Step 2: Slice the rolls
Slice the rolls horizontally while keeping them connected. Set aside the top row and place the bottom row in the baking dish.
Step 3: Layer the filling
Evenly distribute 1 cup of mozzarella on the bottom buns. Spread pizza sauce over the cheese. Arrange pepperoni in 5 rows with 4 slices in each row on top of the sauce.
Step 4: Finish assembly
Sprinkle 1¼ cups of mozzarella over the pepperoni, then place the remaining row of connected buns on top.
Step 5: Add toppings and bake
Brush melted butter on top of buns, sprinkle with grated Parmesan and Italian seasoning, cover with foil, and bake for 25 minutes.
Step 6: Slice and serve
Take out of the oven and slice the rows to separate the slider sandwiches. Serve immediately.
Storage Tips
To store the finished pizza sliders, you can assemble them completely and refrigerate for up to a day before baking. If you do refrigerate them before baking, remember to add about five extra minutes to the cooking time to ensure they are heated through. However, it’s important to refrain from brushing the sliders with the butter and seasoning until right before baking to prevent the tops from getting soggy.
Leftover pizza sliders can be stored in the fridge for a couple of days. When reheating, it is recommended to use the oven or an air fryer to maintain the soft texture of the rolls. Microwaving the sliders may result in chewy rolls instead of the desired softness. While these sliders do not freeze well due to changes in the bread texture, they can be easily stored in the fridge and reheated for a quick and delicious leftover meal.
Ingredient Substitutions
For a different twist on the classic pizza sliders, try swapping the pepperoni for cooked sausage, ham, or a mix of your favorite vegetables like bell peppers, mushrooms, and olives. This change can cater to different tastes and dietary preferences while still delivering delicious flavors.
If you want to experiment with different cheeses, feel free to use alternatives like cheddar or provolone in place of the mozzarella for a unique flavor profile. You can even mix cheeses together for a more complex taste. For a meatier option, consider combining pepperoni with sausage for a hearty slider filling that will satisfy meat lovers.
If you’re looking to prepare these sliders in advance, you can assemble them ahead of time and refrigerate for up to a day before baking. Just remember to add a few extra minutes to the baking time if they’re cold from the fridge. Additionally, refrain from brushing them with butter and seasoning until right before baking to prevent the tops from becoming soggy. These adaptable sliders are perfect for various occasions and can be customized to suit different preferences, making them a versatile and crowd-pleasing option for any gathering.
Serving Suggestions
For a creative twist on serving these delicious pizza sliders, try setting up a DIY slider bar for your next gathering. Provide various toppings like extra shredded cheese, diced veggies, different meats, and even pineapple for those who like it on their pizza. Let guests customize their sliders before baking, creating a fun and interactive experience that caters to different tastes.
To elevate these pizza sliders for a more sophisticated occasion, consider serving them as an appetizer on a wooden board or slate platter. Garnish with fresh basil leaves and a drizzle of balsamic glaze for a touch of elegance. The bite-sized portions make them perfect for cocktail parties or upscale events where guests can enjoy a gourmet twist on a classic comfort food.
FAQs for Cheesy Pizza Sliders – Easy & Delicious Recipe
Can I make these pizza sliders ahead of time?
Yes, you can assemble the pizza sliders completely and refrigerate them for up to a day before baking. Just remember to add about five extra minutes to the cooking time if they’re cold from the fridge. However, it’s best to brush them with butter and seasonings right before baking to prevent the tops from getting soggy.
How should I store the leftovers?
Leftover pizza sliders can be stored in the fridge for a couple of days. They reheat well in the oven or air fryer, but it’s best to avoid the microwave as it can make the rolls chewy instead of soft. These sliders do not freeze well as the bread texture changes too much.
What are some variations I can try with these pizza sliders?
You can customize these pizza sliders by swapping out the pepperoni for sausage, ham, or vegetables. You can also experiment with different cheeses such as cheddar or provolone. For meat lovers, you can add a combination of pepperoni and sausage. Vegetarian versions with mushrooms, peppers, and olives are colorful and flavorful options.
How can I prevent the rolls from becoming soggy when making pizza sliders?
To prevent the rolls from becoming soggy, it’s recommended to layer the ingredients properly. Start with a layer of cheese (1 cup of shredded mozzarella), followed by the pizza sauce, then add the pepperoni slices and the remaining shredded mozzarella (1 1/4 cups). This cheese layer acts as a barrier, keeping the rolls soft but not mushy during baking.
Conclusion
Pizza sliders are a game-changer for any occasion, whether it’s a casual get-together, a busy weeknight dinner, or a special event. The beauty of these sliders lies in their simplicity and versatility. You can easily customize them to suit your preferences or use whatever ingredients you have on hand. The combination of gooey cheese, savory toppings, and buttery garlic goodness nestled in soft Hawaiian rolls is pure comfort food that never fails to impress.
So, the next time you’re in need of a crowd-pleasing dish that’s as delicious as it is easy to make, remember the magic of Pizza Sliders. They have a way of bringing people together and putting a smile on everyone’s face. Whip up a batch, share them with your loved ones, and enjoy the delightful experience of savoring these irresistible little bites of pizza perfection.
Cheesy Pizza Sliders – Easy & Delicious Recipe
Pizza sliders: Hawaiian rolls stuffed with gooey cheese, zesty pepperoni, and savory sauce, topped with garlic butter for a bite-sized snack that disappears in seconds.
Prep Time10 Minutes
Cook Time25 Minutes
Total Time35 Minutes
CuisineAmerican
Skill LevelEasy
Servings12 Servings (12 pizza sliders)
Ingredients
Main Components
- 20 slices deli style dry cured pepperoni
- 12 count package Hawaiian rolls
- 2½ cups shredded mozzarella, divided (1 cup and 1¼ cups)
- ¾ cup pizza sauce
Topping
- 1 teaspoon dried Italian seasoning
- 2 tablespoons grated Parmesan
- ⅓ cup salted sweet cream butter, melted
Instructions
-
Prep oven and dish: Preheat oven to 375°F and lightly coat a 9×13 baking dish with nonstick spray.
-
Slice the rolls: Slice the rolls horizontally while keeping them connected. Set aside the top row and place the bottom row in the baking dish.
-
Layer the filling: Evenly distribute 1 cup of mozzarella on the bottom buns. Spread pizza sauce over the cheese. Arrange pepperoni in 5 rows with 4 slices in each row on top of the sauce.
-
Finish assembly: Sprinkle 1¼ cups of mozzarella over the pepperoni, then place the remaining row of connected buns on top.
-
Add toppings and bake: Brush melted butter on top of buns, sprinkle with grated Parmesan and Italian seasoning, cover with foil, and bake for 25 minutes.
-
Slice and serve: Take out of the oven and slice the rows to separate the slider sandwiches. Serve immediately.