Follow Me On Social Media!
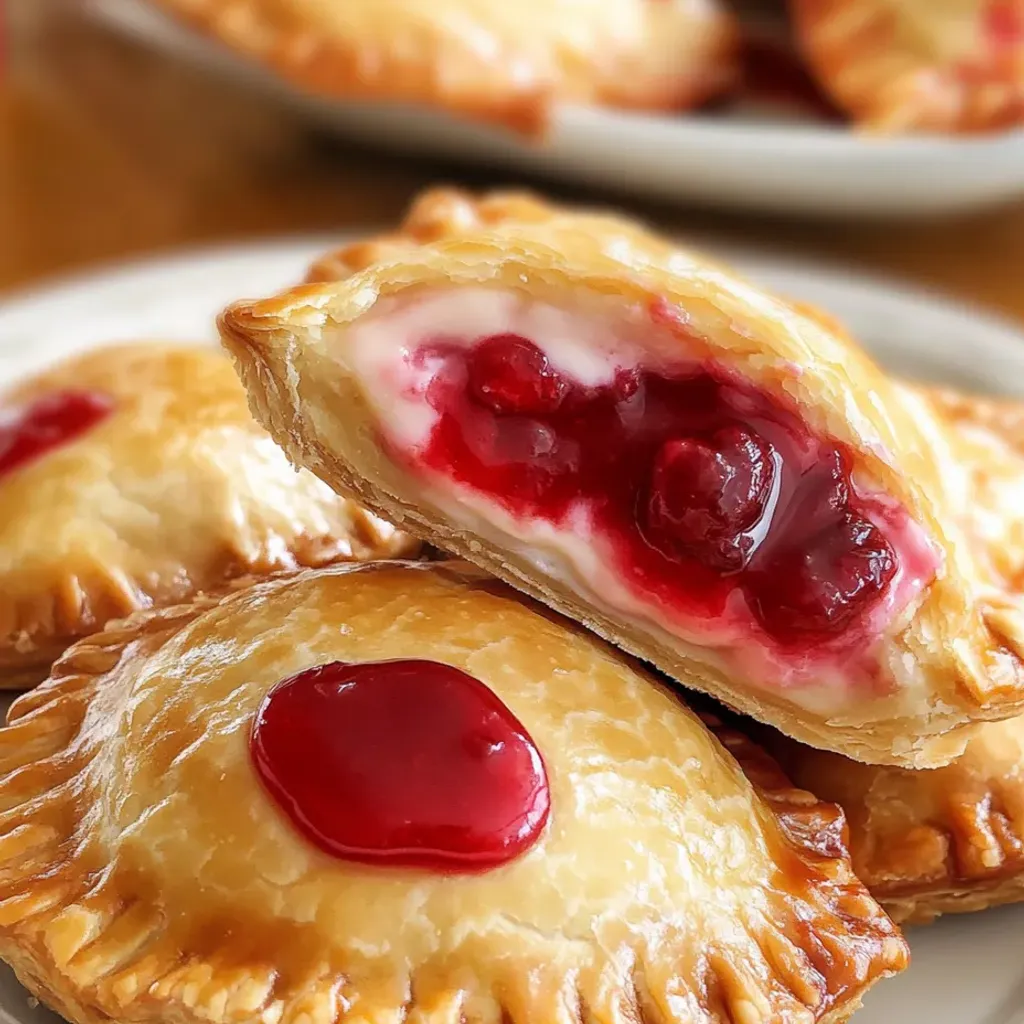
If you’re looking to impress at your next gathering or simply satisfy your sweet tooth with a delightful treat, look no further than these Cherry Cheesecake Hand Pies. Imagine a crispy, golden-brown fried pie crust embracing a luscious blend of tangy cream cheese and sweet cherry pie filling – it’s a match made in dessert heaven. These hand pies are not only a breeze to make but also a guaranteed crowd-pleaser that will have everyone coming back for more.
I stumbled upon this recipe a few years ago when I was tired of bringing the same old cookies to potlucks. Since then, these little pockets of joy have become a staple at family gatherings and friend get-togethers. The best part? They look and taste like you spent hours slaving away in the kitchen when, in reality, they come together with ease. So whether you’re aiming to silence the toughest critic at the table or simply treat yourself to a delectable indulgence, these Cherry Cheesecake Hand Pies are sure to hit the spot.
Quick Benefits
- Easy to prepare and assemble for a delicious treat
- Versatile – can be customized with different fillings and flavors
- Crowd-pleaser – always impresses guests and loved by all ages
- Perfect for various occasions from casual movie nights to special celebrations
Why You’ll Love This Cherry Cheesecake Hand Pies Recipe Recipe
- Quick and Easy: Despite looking and tasting gourmet, this recipe is actually easy to throw together, making it perfect for impressing guests without spending all day in the kitchen.
- Crowd-Pleaser: Even the pickiest eaters will love the combination of tangy cream cheese and sweet cherry filling encased in a crispy, fried pie crust that will leave them coming back for more.
- Versatile: The recipe allows for various flavor variations like blueberry, apple, lemon curd, or even a savory version with herb cream cheese and mushrooms, catering to different tastes and occasions.
- Perfect for Special Events: Whether it’s a family movie night or a fancy baby shower, these hand pies will elevate any gathering and leave a lasting impression on your guests.
- Memorable Presentation: You can choose to serve them casually on any clean plate or go the extra mile by arranging them on a beautiful cake stand with additional garnishes like fresh cherries for a more elegant presentation.
- Make-Ahead Option: While they are best enjoyed fresh, you can prepare the pies ahead of time by assembling them and refrigerating until ready to fry, making them a convenient option for busy schedules or planned events.
Ingredients for Cherry Cheesecake Hand Pies Recipe
Filling
- 21 oz can cherry pie filling
- 1 package refrigerated pie crust (2 crusts)
- 1/4 cup granulated sugar
- 4 oz cream cheese, softened
Sugar Glaze
- 1 teaspoon corn syrup
- 1 tablespoon water
- 1/2 cup powdered sugar
For Frying
- Vegetable oil, for deep frying (about 4-6 cups)
How to Make Cherry Cheesecake Hand Pies Recipe
Step 1: Prepare for frying
Pour vegetable oil into a heavy dutch oven or pot, filling it 4-5 inches deep. Attach an oil or candy thermometer and heat the oil to 375°F, ensuring it stays at this temperature to fry the pies correctly.
Step 2: Make cream cheese filling
In a medium bowl, mix together sugar and softened cream cheese using a hand mixer until smooth and well combined, about 2 minutes.
Step 3: Prepare pie crust
Unwrap the refrigerated pie crusts on a floured surface. Use a 5-6 inch bowl to trace and cut out circles from the dough with a knife or pastry wheel. Roll out the dough if necessary to make 6 rounds in total.
Step 4: Fill the hand pies
Spoon a heaping tablespoon of cream cheese filling into the center of each pie crust round. Add approximately 2 tablespoons of cherry pie filling on top, ensuring not to spread it to the edges.
Step 5: Seal the pies
Moisten the edges of each round with water, then fold the dough over to form a half-moon shape. Press the edges together firmly to seal, and use a fork to crimp the edges for added security against filling leakage.
Step 6: Prepare the glaze
Combine powdered sugar, corn syrup, and water in a small bowl, whisking until smooth to create the sugar glaze. Set aside before frying the pies.
Step 7: Fry the hand pies
Lower hand pies into hot oil one at a time. Fry for 2-3 minutes, turning occasionally, until crust is deep golden brown. Remove with slotted spoon and drain on paper towels.
Step 8: Glaze while warm
Apply sugar glaze to both sides of the warm hand pie using a pastry brush. Set the glazed pie on a baking sheet or cooling rack. Repeat the frying and glazing steps with the remaining hand pies, focusing on one pie at a time.
Step 9: Serve
Enjoy the hand pies warm to experience the best flavor and texture, with a crispy glazed exterior and a warm, gooey filling.
📌 Pin for later!

Storage Tips
Once you’ve made these delicious Cherry Cheesecake Hand Pies, storing any leftovers can be a bit tricky due to the fried crust. If you happen to have some remaining, the best way to store them is by leaving them covered on the counter overnight. While they may lose some of their crispiness, they will still be tasty. Avoid refrigerating them as the crust tends to become soggy and loses its texture.
If you need to make these hand pies ahead of time, it’s recommended to assemble them but refrain from frying them. You can refrigerate the assembled but unfried pies and then bring them to room temperature before frying. Freezing the assembled pies is not advisable as they tend to spatter heavily in the oil when cooked from frozen. Therefore, it’s best to fry them fresh for the best results. These hand pies are best enjoyed fresh, but with proper storage and handling, you can still savor them the next day.
Ingredient Substitutions
If you’re looking to make some ingredient substitutions for the Cherry Cheesecake Hand Pies, there are a few options you can try. For the cream cheese, if you prefer a lighter version, you could use Neufchâtel cheese instead. It has a lower fat content but still provides a creamy texture similar to cream cheese. Another option would be to use Greek yogurt or a dairy-free cream cheese alternative for a different flavor profile.
In terms of the pie filling, feel free to get creative with different fruit fillings based on your preferences or what’s in season. You could use raspberry, blueberry, apple, or even peach pie filling as delicious alternatives to cherry. Mixing different fruits together can also create unique flavor combinations.
For the deep frying part, if you prefer not to deep fry, you could try baking the hand pies in the oven for a healthier twist. Brushing them with egg wash and baking at a high temperature until golden brown can give you a similar crispy exterior without the oil. Just keep an eye on them to ensure they don’t burn. Experimenting with these substitutions can add a personal touch to the recipe and cater to different dietary preferences and restrictions.
Serving Suggestions
For a creative serving suggestion, try serving these cherry cheesecake hand pies with a dollop of whipped cream and a sprinkle of crushed graham crackers on top. The added texture and flavor will elevate the dessert to a whole new level of deliciousness.
Another fun idea is to drizzle a homemade cherry compote over the hand pies before serving. The extra burst of cherry flavor will intensify the filling and add a beautiful touch of elegance to the presentation, making them perfect for a dinner party or special occasion.
FAQs for Cherry Cheesecake Hand Pies Recipe
Can I use homemade cherry pie filling instead of canned?
Yes, you can definitely use homemade cherry pie filling in this recipe. Just make sure it’s thick enough to prevent the pies from becoming soggy during frying.
Can I bake these hand pies instead of deep frying?
While deep frying gives the pies a crispy texture, you can bake them as an alternative. Brush the assembled pies with egg wash and bake at 375°F (190°C) for about 20-25 minutes or until golden brown.
Can I make the cream cheese filling ahead of time?
Absolutely! You can prepare the cream cheese mixture ahead of time and store it covered in the refrigerator. Just make sure to let it come to room temperature before filling the pie crusts.
How do I store any leftover hand pies?
If you have leftovers, store them covered at room temperature overnight. While they may lose some crispiness, they will still be delicious. Avoid refrigerating them as the crust can become soggy, and freezing assembled pies is not recommended due to spattering during frying.
Conclusion
As you embark on making these delectable Cherry Cheesecake Hand Pies, remember that each crispy, creamy, and indulgent bite is a labor of love. Whether you’re preparing them for a special occasion or just as a delightful treat for yourself, these hand pies never fail to impress. The versatility of this recipe allows for endless variations, ensuring that you can cater to different tastes and occasions with ease. So go ahead, get creative, and make these Cherry Cheesecake Hand Pies a staple in your baking repertoire.
The next time you find yourself craving a sweet and satisfying dessert, look no further than these Cherry Cheesecake Hand Pies. They’re sure to be a hit with your family and friends, just like they have been in my home for years. So don’t hesitate to whip up a batch and delight your taste buds with the perfect harmony of flavors. Cherish the moments spent baking and sharing these hand pies – after all, good food is meant to be enjoyed and shared with those you love.
📌 Pin for later!
Cherry Cheesecake Hand Pies Recipe
Indulge in crispy, cherry-filled hand pies with creamy cheesecake centers, a foolproof crowd-pleaser that’s surprisingly easy to make.
Prep Time30 Minutes
Cook Time6 Minutes
Total Time36 Minutes
CuisineAmerican
Skill LevelEasy
Servings6 Servings (6 hand pies)
Ingredients
Filling
- 21 oz can cherry pie filling
- 1 package refrigerated pie crust (2 crusts)
- 1/4 cup granulated sugar
- 4 oz cream cheese, softened
Sugar Glaze
- 1 teaspoon corn syrup
- 1 tablespoon water
- 1/2 cup powdered sugar
For Frying
- Vegetable oil, for deep frying (about 4-6 cups)
Instructions
-
Prepare for frying: Pour vegetable oil into a heavy dutch oven or pot, filling it 4-5 inches deep. Attach an oil or candy thermometer and heat the oil to 375°F, ensuring it stays at this temperature to fry the pies correctly.
-
Make cream cheese filling: In a medium bowl, mix together sugar and softened cream cheese using a hand mixer until smooth and well combined, about 2 minutes.
-
Prepare pie crust: Unwrap the refrigerated pie crusts on a floured surface. Use a 5-6 inch bowl to trace and cut out circles from the dough with a knife or pastry wheel. Roll out the dough if necessary to make 6 rounds in total.
-
Fill the hand pies: Spoon a heaping tablespoon of cream cheese filling into the center of each pie crust round. Add approximately 2 tablespoons of cherry pie filling on top, ensuring not to spread it to the edges.
-
Seal the pies: Moisten the edges of each round with water, then fold the dough over to form a half-moon shape. Press the edges together firmly to seal, and use a fork to crimp the edges for added security against filling leakage.
-
Prepare the glaze: Combine powdered sugar, corn syrup, and water in a small bowl, whisking until smooth to create the sugar glaze. Set aside before frying the pies.
-
Fry the hand pies: Lower hand pies into hot oil one at a time. Fry for 2-3 minutes, turning occasionally, until crust is deep golden brown. Remove with slotted spoon and drain on paper towels.
-
Glaze while warm: Apply sugar glaze to both sides of the warm hand pie using a pastry brush. Set the glazed pie on a baking sheet or cooling rack. Repeat the frying and glazing steps with the remaining hand pies, focusing on one pie at a time.
-
Serve: Enjoy the hand pies warm to experience the best flavor and texture, with a crispy glazed exterior and a warm, gooey filling.