Follow Me On Social Media!
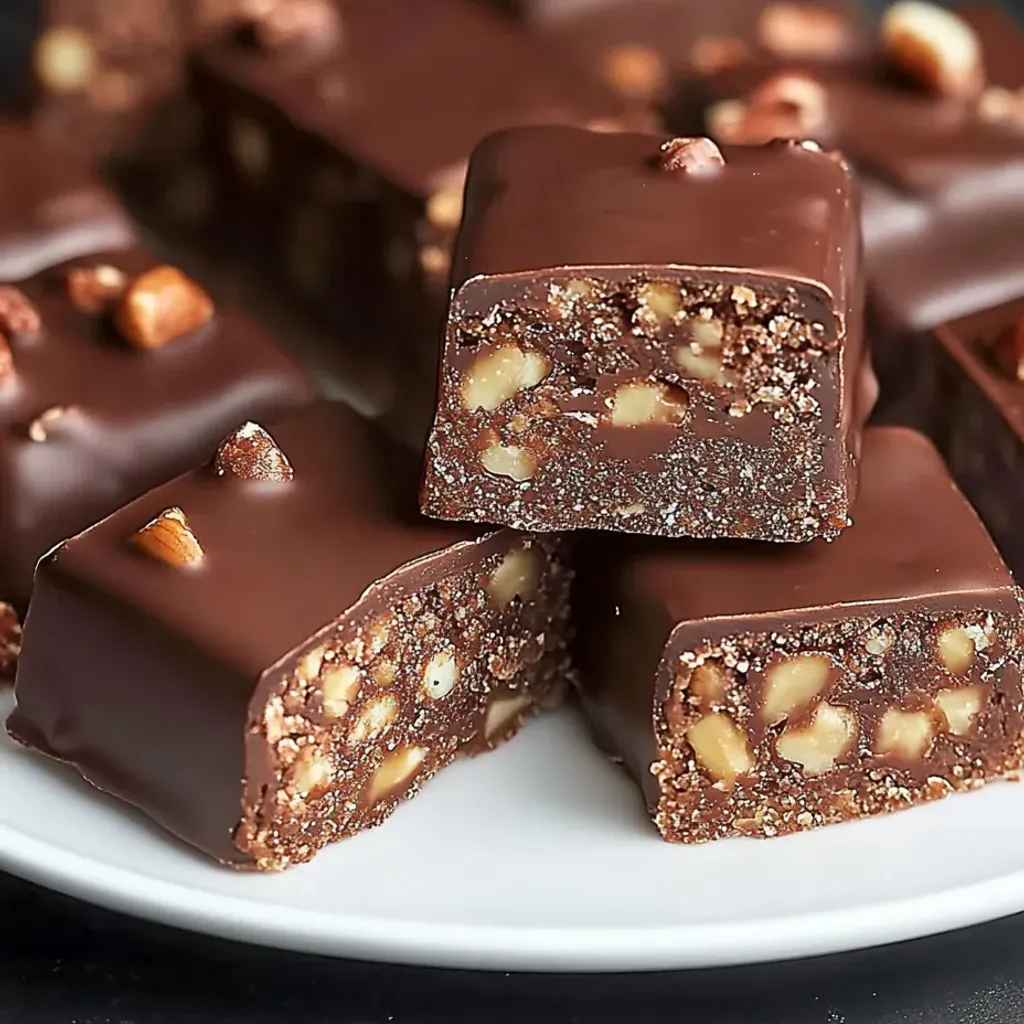
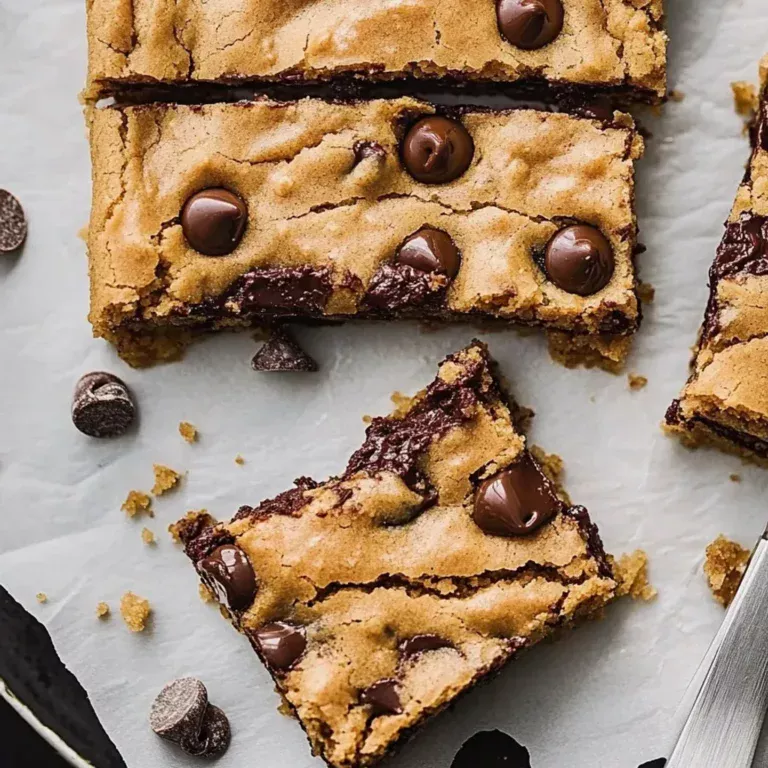
Craving a decadent treat without the hassle of turning on the oven? Look no further than these irresistible No-Bake Chocolate Biscuit Bars. Perfect for hot summer days or when you need a quick and indulgent dessert fix, these bars are a game-changer. The delightful contrast of crunchy biscuits, toasty peanuts, and velvety chocolate will have your taste buds singing with joy. Trust me, once you try these, they’ll become a staple in your dessert arsenal.
I stumbled upon these heavenly chocolate biscuit bars during a sweltering August heatwave, and they saved me from a dessert dilemma. The best part? You don’t need to be a baking pro to whip these up. Just a few simple steps, some chilling time, and you’ll have a crowd-pleasing treat that looks like you spent hours in the kitchen. From picky eaters to dessert aficionados, these bars have won over hearts and taste buds alike. So go ahead, give this recipe a try and watch it become a favorite among friends and family – just remember to save some for yourself!
Quick Benefits
- Convenient: No baking required, perfect for hot weather or when you don’t want to heat up the kitchen.
- Versatile: Endless variations possible – from tropical twists to holiday-themed options.
- Crowd-Pleaser: Appeals to picky eaters and dessert lovers alike, great for parties or casual snacking.
- Long-Lasting: Can be stored in the fridge for up to a week or frozen for later enjoyment.
Why You’ll Love This Decadent No-Bake Chocolate Biscuit Bars Recipe
- Quick and Easy: This no-bake recipe is perfect for satisfying your sweet tooth without having to turn on the oven. With minimal effort, you can have a delicious treat ready in no time.
- Perfect for Summer: Ideal for hot days when you don’t want to heat up the kitchen, these chocolate biscuit bars are a refreshing and indulgent dessert option.
- Kid-Approved: Even the pickiest eaters, like Tommy, can’t resist these bars. They are a hit with both children and adults, making them a versatile treat for any occasion.
- Customizable: With endless variations to explore, such as adding coconut, espresso, or salted caramel, you can tailor these bars to suit your taste preferences or seasonal cravings.
- Versatile Serving Options: Whether you’re hosting a dinner party, coffee morning, or simply enjoying a casual picnic, these bars can be presented in various ways to elevate the experience.
- Long-lasting: While these bars are unlikely to last very long due to their deliciousness, they can be stored in the fridge for up to a week or frozen for later enjoyment. Perfect for meal prep or spontaneous cravings.
- Crowd-Pleaser: From school bake sales to fancy dinner parties, these bars are universally loved for their rich, not-too-sweet flavor and satisfying texture. They are sure to impress any audience.
Ingredients for Decadent No-Bake Chocolate Biscuit Bars
For the Biscuit Base
- 1 packet (10g) vanilla sugar (optional)
- ½ cup (1.6 oz / 45g) cocoa powder
- ½ cup (3 oz / 85g) sugar
- 1 cup (3 oz / 85g) ground peanuts
- 12.3 oz (350g) biscuits, crushed
- ½ cup (3.9 oz / 110g) butter
- ¾ cup (6 fl oz / 180ml) sweet cream
For the Chocolate Coating
- 1 oz (30g) dark chocolate
- 3.2 oz (90g) milk chocolate
- 2 tbsp (1 oz / 30g) vegetable oil
For the Topping
- ¾ cup (2.5 oz / 70g) ground peanuts
How to Make Decadent No-Bake Chocolate Biscuit Bars
Step 1: Prepare the biscuit mixture
Use a food processor to crush biscuits into fine crumbs. In a large bowl, combine the crushed biscuits with ground peanuts, sugar, vanilla sugar (if using), and cocoa powder. Mix well.
Step 2: Make the binding mixture
In a saucepan, melt butter over low heat. Stir in sweet cream until combined. Pour over biscuit mixture and mix until well incorporated. Adjust consistency as needed with more cream or biscuit crumbs.
Step 3: Shape and chill the base
Line a 9×13 inch rectangular baking dish with parchment paper. Firmly press the biscuit mixture into the dish to create an even layer. Use a spoon or flat-bottomed glass to compact it. Refrigerate for 30 minutes to set.
Step 4: Prepare the chocolate coating
In a heatproof bowl, combine milk chocolate and dark chocolate. Melt using a double boiler or in the microwave in short bursts, stirring often. Once melted, mix in vegetable oil until smooth and glossy.
Step 5: Assemble and set
Spread the melted chocolate mixture evenly over the chilled biscuit base. Sprinkle ground peanuts on top. Chill in the refrigerator for at least 1 hour until set.
Step 6: Slice and serve
Once the slab has fully set, remove it from the baking dish by lifting it with the help of the parchment paper. Cut into bars or squares using a sharp knife. For neat slices, remember to wipe the knife clean between each cut.
Storage Tips
After making a batch of these delightful no-bake chocolate biscuit bars, you can store them in the refrigerator for up to a week. Place the bars in an airtight container and layer parchment paper between them to prevent sticking. If you anticipate enjoying them within a day or so, they can also be kept at room temperature, making them a convenient treat for picnics or potlucks.
If you want to savor these bars for longer, they can be frozen for future enjoyment. Simply wrap individual portions in plastic wrap or foil and store them in the freezer. When ready to eat, thaw the bars in the refrigerator overnight for best results. Surprisingly, the texture of these bars holds up well after freezing, allowing you to enjoy their deliciousness even after being stored in the freezer.
Ingredient Substitutions
If you need to make ingredient substitutions for the no-bake chocolate biscuit bars, there are a few options to consider. You can swap the ground peanuts with another nut or seed butter like almond butter or sunflower seed butter for a different flavor profile. If you have nut allergies, crushed pretzels or toasted coconut flakes can be used instead of the ground peanuts to add crunch and texture to the bars.
For the sweet cream, you can substitute with coconut cream for a dairy-free option or Greek yogurt for a tangier taste. If you prefer a lighter option, you could use reduced-fat cream cheese or thick Greek yogurt instead of sweet cream. Additionally, if you don’t have vanilla sugar on hand, you can use regular granulated sugar and a splash of vanilla extract for flavor. These substitutions allow for personalization and adaptation to dietary preferences or ingredient availability while still maintaining the essence of the delicious bars.
Serving Suggestions
For a lovely presentation at a dinner party, serve these decadent no-bake chocolate biscuit bars cut into small squares alongside fresh raspberries and a dollop of mascarpone cream. The combination of the rich bars with the tartness of the berries and creamy mascarpone is sure to impress your guests and create a perfect balance of flavors.
For a fun and indulgent dessert option, crumble a bar of these chocolate biscuit bars over a scoop of vanilla ice cream. The contrast of the crunchy bars and smooth ice cream adds a delightful texture, while the rich chocolate flavor complements the creamy vanilla perfectly. It’s a simple yet satisfying treat that will have everyone reaching for seconds.
FAQs for Decadent No-Bake Chocolate Biscuit Bars
Can I use a different type of nut instead of peanuts?
Yes, you can definitely substitute peanuts with your preferred nuts like almonds, walnuts, or hazelnuts to customize the flavor of the bars.
How long should I chill the bars before cutting them?
It’s recommended to chill the bars for at least 2-3 hours to ensure they are firm enough for cutting into neat squares. However, for best results, you can leave them in the fridge overnight.
Can I make these bars ahead of time for a party?
Absolutely! These bars actually keep well in the fridge for about a week. You can make them a day or two in advance, stored in an airtight container with parchment between layers to maintain their texture.
Can I freeze these bars?
Yes, you can freeze these bars for longer storage. Simply wrap individual portions in plastic wrap or foil, place them in an airtight container or freezer bag, and thaw in the fridge overnight when ready to enjoy. The texture of the bars holds up surprisingly well after freezing.
Conclusion
No-Bake Chocolate Biscuit Bars are truly a lifesaver for those moments when you crave a decadent treat but want to avoid turning on the oven. The simplicity of this recipe belies the rich and satisfying flavors that come together in every bite. Whether you’re a seasoned baker or a novice in the kitchen, these bars are sure to impress with their delightful combination of crunchy biscuits, nutty peanuts, and luscious chocolate. Remember, the key is patience as you allow them to set – the reward is well worth the wait.
As you embark on your own No-Bake Chocolate Biscuit Bars adventure, don’t be discouraged by any mishaps along the way. Every failed attempt is just a step closer to mastering this crowd-pleasing recipe. Feel free to get creative and personalize these bars to suit your taste preferences – from incorporating different nuts to adding unique flavor twists. The versatility of this recipe makes it a perfect go-to for any occasion, whether you’re hosting a casual gathering or simply treating yourself to a well-deserved indulgence. So go ahead, whip up a batch of these delightful bars and watch as they disappear in no time – your secret to effortless deliciousness is safe with us!
Decadent No-Bake Chocolate Biscuit Bars
Indulge in these no-bake chocolate biscuit bars – a rich, crunchy, and decadent treat that’s effortless to make but tastes like a labor of love.
Prep Time20 Minutes
Cook Time~ undefined
Total Time20 Minutes
CuisineEuropean
Skill LevelEasy
Servings24 Servings (24 bars)
Ingredients
For the Biscuit Base
- 1 packet (10g) vanilla sugar (optional)
- ½ cup (1.6 oz / 45g) cocoa powder
- ½ cup (3 oz / 85g) sugar
- 1 cup (3 oz / 85g) ground peanuts
- 12.3 oz (350g) biscuits, crushed
- ½ cup (3.9 oz / 110g) butter
- ¾ cup (6 fl oz / 180ml) sweet cream
For the Chocolate Coating
- 1 oz (30g) dark chocolate
- 3.2 oz (90g) milk chocolate
- 2 tbsp (1 oz / 30g) vegetable oil
For the Topping
- ¾ cup (2.5 oz / 70g) ground peanuts
Instructions
-
Prepare the biscuit mixture: Use a food processor to crush biscuits into fine crumbs. In a large bowl, combine the crushed biscuits with ground peanuts, sugar, vanilla sugar (if using), and cocoa powder. Mix well.
-
Make the binding mixture: In a saucepan, melt butter over low heat. Stir in sweet cream until combined. Pour over biscuit mixture and mix until well incorporated. Adjust consistency as needed with more cream or biscuit crumbs.
-
Shape and chill the base: Line a 9×13 inch rectangular baking dish with parchment paper. Firmly press the biscuit mixture into the dish to create an even layer. Use a spoon or flat-bottomed glass to compact it. Refrigerate for 30 minutes to set.
-
Prepare the chocolate coating: In a heatproof bowl, combine milk chocolate and dark chocolate. Melt using a double boiler or in the microwave in short bursts, stirring often. Once melted, mix in vegetable oil until smooth and glossy.
-
Assemble and set: Spread the melted chocolate mixture evenly over the chilled biscuit base. Sprinkle ground peanuts on top. Chill in the refrigerator for at least 1 hour until set.
-
Slice and serve: Once the slab has fully set, remove it from the baking dish by lifting it with the help of the parchment paper. Cut into bars or squares using a sharp knife. For neat slices, remember to wipe the knife clean between each cut.