Follow Me On Social Media!
If there’s one dessert that never fails to bring a smile to faces and evoke a sense of nostalgia, it’s good old Banana Pudding. This classic recipe has been a cherished staple in my family for generations, passed down from my grandma’s handwritten recipe box. Picture this: layers of soft vanilla wafers, ripe bananas, and a lusciously creamy pudding mixture that’s a true comfort in every spoonful. It’s simple, unassuming, yet absolutely irresistible.
I vividly remember the time I brought this Banana Pudding to a Memorial Day cookout, and it was a hit like no other. A guest from Georgia, yearning for a taste of home, took a bite and was transported back in time. That’s the magic of this dessert – it transcends mere ingredients and becomes a vessel for cherished memories and heartwarming moments. Over the years, I’ve fine-tuned this recipe to perfection, adding a touch of extra vanilla here, a dollop of sweetened condensed milk there, all to ensure that each bite is a symphony of flavors.
Whether you serve it in a trifle bowl for an elegant touch or in individual mason jars for a fun twist, Banana Pudding never fails to impress. And the best part? It’s endlessly customizable. From adding strawberries for a fruity kick to indulging in a chocolate or bourbon-infused variation, the options are as vast as your imagination. So go ahead, whip up a batch of this delightful Banana Pudding, share it with loved ones, and bask in the joy that this humble dessert brings to all who taste it.
Quick Benefits
- Easy to make with simple ingredients
- Rich and creamy texture with a caramel undertone
- Versatile – can be customized with different flavors and toppings
- Perfect balance of flavors and textures that make it a crowd-pleaser
Why You’ll Love This Delicious and Creamy Homemade Banana Pudding Recipe
- Nostalgic Family Recipe: This banana pudding recipe has been passed down through generations, making it a beloved family classic.
- Easy to Prepare: With simple ingredients and minimal effort required, this recipe is perfect for anyone looking to make a delicious dessert without spending hours in the kitchen.
- Unexpected Flavor Depth: The addition of sweetened condensed milk adds a rich caramel undertone to the pudding, elevating it from a simple dessert to a flavorful delight.
- Perfect Texture Combination: The soft vanilla wafers, sweet bananas, and creamy pudding create a harmonious blend of textures that will tantalize your taste buds.
- Versatile and Customizable: From adding strawberries to using different pudding flavors or incorporating bourbon, this recipe can be easily adapted to suit your preferences and create unique variations.
- Impressive Presentation Options: Whether served in a trifle bowl, mason jars, or as part of a banana pudding bar, this dessert offers various presentation styles that will impress your guests.
- Make-Ahead Friendly: You can prepare parts of the recipe in advance, allowing you to assemble the dessert just before serving, making it ideal for special occasions and gatherings.
- Universal Crowd-Pleaser: Loved by all, even those who claim not to like bananas, this banana pudding has a magical way of bringing joy and satisfaction to everyone who tries it.
Ingredients for Delicious and Creamy Homemade Banana Pudding
- Instant vanilla pudding mix – Could I make pudding from scratch? Sure. Do I want to stand over a hot stove stirring forever? Absolutely not. The instant stuff works perfectly here.
- Whipped topping – I know food snobs will say to use real whipped cream, but the stabilized stuff from the freezer section holds up way better for this. I’ve tried both, and the real whipped cream starts to weep and collapse by day two.
- Fresh bananas – Obviously important! You want them ripe with some brown spots, but not banana bread territory. Too green and they taste weird, too brown and they get slimy.
- Vanilla wafers – Don’t even think about using generic here. I’ve tried. Trust me, name-brand Nilla Wafers have the perfect texture and vanilla flavor. The cheap ones turn to mush.
- Sweetened condensed milk – This is the secret ingredient that makes people think you made some complicated custard from scratch. It adds this rich caramel-y undertone that takes everything up ten notches.
How to Make Delicious and Creamy Homemade Banana Pudding
Step 1: Prepare pudding base
In a large bowl, whisk together pudding mix and cold milk for 2 minutes until thick.
Step 2: Create pudding mixture
Combine sweetened condensed milk and vanilla extract, then gently fold in whipped topping until fully mixed.
Step 3: Layer ingredients
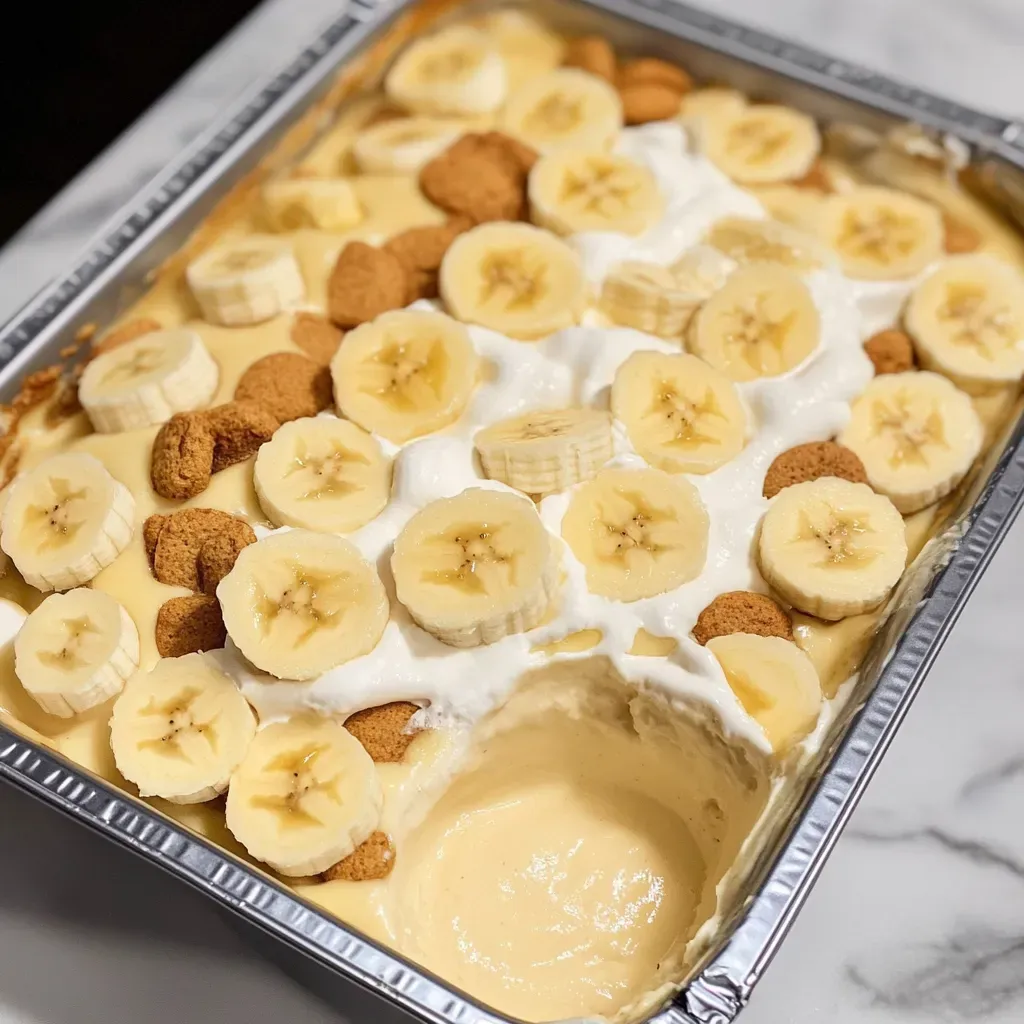
In a trifle dish or 9×13 baking dish, layer vanilla wafers, banana slices, and pudding mixture.
Step 4: Repeat layers
Alternate layers of vanilla wafers, banana slices, and pudding mixture until all ingredients are used, ending with a layer of pudding on top.
Step 5: Chill
Place plastic wrap over the dish and refrigerate for a minimum of 4 hours or overnight to allow flavors to blend and wafers to soften before serving.
Storage Tips
Once the banana pudding is prepared, it can be stored in the refrigerator for about 3 days before the bananas begin to deteriorate. To maintain freshness, tightly cover the dish with plastic wrap, ensuring the wrap touches the surface of the pudding to prevent a skin from forming. Avoid freezing leftovers, as defrosted bananas can become unpleasant in texture. If you need to prepare the dessert ahead of time for a special occasion, consider storing the pudding mixture separately and assembling the dish with sliced bananas a few hours before serving.
For serving variations, the banana pudding can be presented in a trifle bowl to showcase the layers or in individual mason jars for a charming touch. To elevate the dish, consider adding sliced strawberries between layers, using chocolate pudding mix, incorporating a hint of bourbon into the pudding mixture, or adding a layer of dulce de leche for extra richness. Remember to reserve some intact wafers for decoration on top just before serving, and for a visually striking presentation, opt for a clear glass serving dish.
Ingredient Substitutions
For potential ingredient substitutions in this banana pudding recipe, you can explore making your pudding from scratch instead of using instant pudding mix. While it may take a bit more effort, a homemade pudding can offer a richer flavor profile. Additionally, if you prefer to use real whipped cream instead of stabilized whipped topping, you can certainly make that swap. Just keep in mind that real whipped cream may not hold up as well over a few days compared to the stabilized version.
If you want to experiment with different flavors, consider using different types of cookies in place of vanilla wafers. Graham crackers or shortbread cookies could provide a unique twist to the traditional recipe. You can also play around with the fruit component by incorporating different fruits like strawberries or even a mix of berries to complement the bananas. These substitutions can add a creative touch to your banana pudding while still maintaining its comforting and delicious appeal.
Serving Suggestions
For a creative serving suggestion, consider layering individual servings of banana pudding in mason jars for a charming and portable twist. This not only makes for a visually appealing presentation but also allows guests to enjoy their own personal portion of this beloved dessert. Another fun idea is to create a “banana pudding bar” where you set out the pudding along with extra bananas, wafers, and various toppings like toasted coconut and chocolate chips. This interactive setup lets guests customize their dessert, adding a fun and unique element to any gathering.
FAQs for Delicious and Creamy Homemade Banana Pudding
Can I make the pudding from scratch instead of using instant pudding mix?
Sure, you can make pudding from scratch, but the instant pudding mix works perfectly for this recipe and saves you the hassle of standing over a hot stove stirring forever. The instant pudding mix gives great results and saves time.
How long does the banana pudding last in the fridge?
The banana pudding can be stored in the fridge for about 3 days before the bananas start to get funky. Make sure to cover it tightly with plastic wrap, pressing it onto the surface of the pudding to prevent a skin from forming.
Can I freeze the banana pudding leftovers?
Avoid freezing the banana pudding leftovers, as defrosted bananas tend to become mushy and lose their texture. If you need to make it ahead for an event, you can prepare the pudding part in advance and assemble with fresh bananas a few hours before serving.
What are some creative variations or additions I can try with this banana pudding recipe?
You can experiment with different variations like adding sliced strawberries between layers, using chocolate pudding mix instead of vanilla, stirring in a bit of bourbon for added depth, or adding a thin layer of dulce de leche over each banana layer. Get creative with toppings like toasted coconut and chocolate chips, or customize with your favorite flavors to make the banana pudding your own.
Conclusion
As you finish up making this beloved Banana Pudding recipe, I hope the aromas of vanilla wafers and sweet bananas wafting through your kitchen fill your heart with warmth and anticipation. Nothing beats the feeling of sharing a classic, comforting dessert with your loved ones, just like generations before us have done. This Banana Pudding isn’t just a dessert; it’s a memory in the making, a story waiting to be told around the table.
Remember, Banana Pudding is more than just a delightful treat; it’s a symbol of love, tradition, and the simple joys of life. So whether you’re preparing it for a special occasion or just a cozy night in, know that each spoonful carries with it a bit of history and a whole lot of heart. Embrace the magic of this timeless dessert, and let its sweet charms bring smiles and satisfaction to all who indulge. Enjoy every moment spent making and savoring this delightful Banana Pudding – may it bring you as much joy as it has brought to countless others before you.
Delicious and Creamy Homemade Banana Pudding
Indulge in layers of nostalgia and comfort with this unforgettable Banana Pudding recipe that will have your guests begging for more.
Prep Time20 Minutes
Cook Time~ undefined
Total Time20 Minutes
CuisineSouthern
Skill LevelEasy
Servings12 Servings
Ingredients
- Instant vanilla pudding mix – Could I make pudding from scratch? Sure. Do I want to stand over a hot stove stirring forever? Absolutely not. The instant stuff works perfectly here.
- Whipped topping – I know food snobs will say to use real whipped cream, but the stabilized stuff from the freezer section holds up way better for this. I’ve tried both, and the real whipped cream starts to weep and collapse by day two.
- Fresh bananas – Obviously important! You want them ripe with some brown spots, but not banana bread territory. Too green and they taste weird, too brown and they get slimy.
- Vanilla wafers – Don’t even think about using generic here. I’ve tried. Trust me, name-brand Nilla Wafers have the perfect texture and vanilla flavor. The cheap ones turn to mush.
- Sweetened condensed milk – This is the secret ingredient that makes people think you made some complicated custard from scratch. It adds this rich caramel-y undertone that takes everything up ten notches.
Instructions
-
Prepare pudding base: In a large bowl, whisk together pudding mix and cold milk for 2 minutes until thick.
-
Create pudding mixture: Combine sweetened condensed milk and vanilla extract, then gently fold in whipped topping until fully mixed.
-
Layer ingredients: In a trifle dish or 9×13 baking dish, layer vanilla wafers, banana slices, and pudding mixture.
-
Repeat layers: Alternate layers of vanilla wafers, banana slices, and pudding mixture until all ingredients are used, ending with a layer of pudding on top.
-
Chill: Place plastic wrap over the dish and refrigerate for a minimum of 4 hours or overnight to allow flavors to blend and wafers to soften before serving.