Follow Me On Social Media!
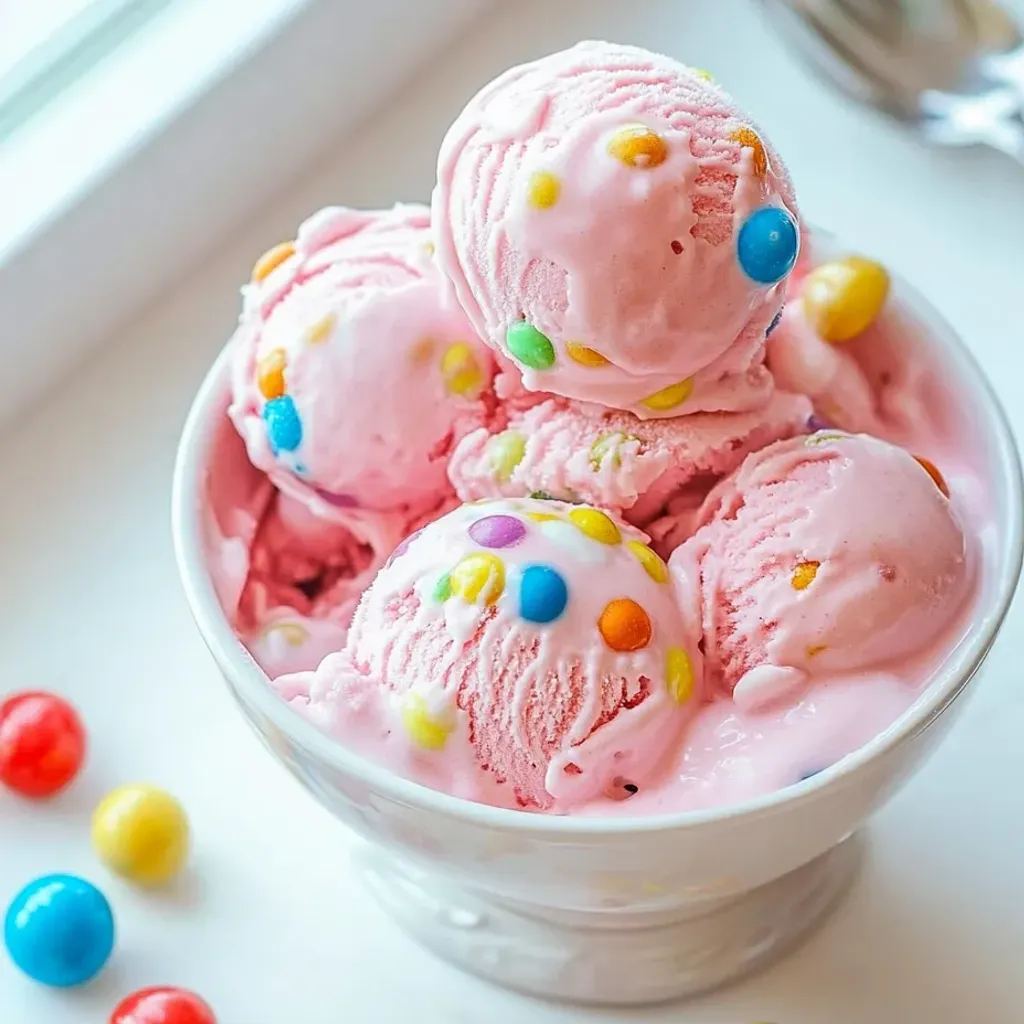
Indulge in a whimsical treat that’s sure to bring smiles to faces young and old with this delightful Bubblegum Ice Cream recipe. Perfect for birthdays, summer parties, or simply when you’re in the mood for a bit of fun, this vibrant pink ice cream captures the nostalgic essence of everyone’s favorite childhood gum. From the first taste of that familiar bubblegum flavor to the sprinkle-studded, creamy texture, this frozen delight is a true crowd-pleaser.
I first discovered the magic of this Bubblegum Ice Cream while planning my daughter’s birthday party, and it has since become a staple at our family gatherings. The sheer joy it brings to those who try it is truly heartwarming. Whether you’re serving it alongside vanilla cake, creating an ice cream bar for guests to customize, or simply enjoying a scoop in a cone with extra gumballs on top, this recipe is sure to create lasting memories and moments of pure happiness. So go ahead, whip up a batch of this playful ice cream and let its nostalgic charm transport you back to the carefree days of childhood.
Quick Benefits
- Creates a visually stunning dessert with its vibrant pink color and playful decorations
- Nostalgic bubblegum flavor that appeals to both kids and adults, invoking a sense of fun and joy
- Simple recipe that is easy to make but leaves a lasting impression, perfect for special celebrations
- Versatile base for creative variations like adding marshmallow fluff, white chocolate chips, or prosecco flavoring
Why You’ll Love This Delicious Homemade Bubblegum Ice Cream Recipe Recipe
- Vibrant and Nostalgic Flavor: The bubblegum flavor combined with the visually striking pink color creates an ice cream that’s both visually appealing and nostalgic, perfect for those looking for a fun and unique dessert experience.
- Kid-Friendly: Children love the authentic bubblegum taste, making it a hit at birthday parties and family gatherings. It’s a simple yet impressive treat that will delight kids of all ages.
- Splurge-Worthy Indulgence: The rich and creamy texture combined with the sweet bubblegum flavor makes it a dessert worth indulging in, perfect for special occasions or when you want to treat yourself.
- Versatile Customization: The recipe offers various ways to customize the ice cream, from adding different toppings and mix-ins to creating different flavor variations, catering to different preferences and occasions.
- Playful Presentation: Serve with gumballs and confetti sprinkles for a playful and festive presentation, perfect for celebrations and parties.
- Memorable Dessert: The ice cream has the power to evoke fond memories of childhood, making it a memorable and heartwarming treat that brings joy to both kids and adults.
- Summer Delight: Ideal for hot summer days, this bubblegum ice cream is a refreshing and delightful treat that’s sure to cool you down and put a smile on your face.
Ingredients for Delicious Homemade Bubblegum Ice Cream Recipe
Ice Cream Base
- Pink or red food coloring (to taste)
- ¾ cup granulated sugar
- 2 teaspoons bubblegum flavoring
- 1 teaspoon vanilla extract
- 2 cups heavy cream
- ¼ teaspoon kosher salt
- 1 cup whole milk
Mix-ins and Toppings
- ½ cup confetti sprinkles, divided
- 1 cup gumballs (for decoration)
How to Make Delicious Homemade Bubblegum Ice Cream Recipe
Step 1: Prepare Ice Cream Maker
Freeze the ice cream maker bowl for a minimum of 24 hours before churning to ensure proper freezing.
Step 2: Mix the Base
Combine heavy cream, whole milk, granulated sugar, bubblegum flavoring, vanilla extract, and kosher salt in a large mixing bowl. Whisk for 2-3 minutes until sugar is dissolved.
Step 3: Add Color
Gradually add a few drops of pink or red food coloring to the mixture, stirring well after each addition until your desired shade of pink is reached. Note that the color will lighten once frozen.
Step 4: Chill the Mixture
For optimal results, cover the bowl with plastic wrap and refrigerate the mixture for at least 1 hour or overnight. This step, although optional, enhances the flavors and texture.
Step 5: Churn the Ice Cream
Transfer the chilled mixture to the ice cream maker and churn as per the manufacturer’s guidelines, typically for 20-25 minutes or until it reaches a soft-serve consistency.
Step 6: Add Sprinkles
In the final 2 minutes of churning, add the majority of the confetti sprinkles, reserving 1 tablespoon for garnishing. Mix until evenly distributed.
Step 7: Transfer to Container
Transfer the churned ice cream to a shallow container or loaf pan, smooth the top with a spatula, and sprinkle the reserved confetti sprinkles on top.
Step 8: Freeze Until Firm
Place plastic wrap directly on the surface of the ice cream in the container to prevent ice crystals. Freeze for a minimum of 4 hours until firm.
Step 9: Serve
Allow the ice cream to soften at room temperature for approximately 5 minutes. Top with colorful gumballs for a fun decoration that can be eaten with the ice cream or separately.
Storage Tips
After preparing the delightful Bubblegum Ice Cream according to the recipe, it’s important to store any leftovers properly to maintain its freshness and flavor. To store the finished ice cream, transfer it to an airtight container, ensuring it is sealed tightly to prevent any air exposure. Properly sealed containers help prevent ice crystals from forming, which can affect the texture of the ice cream. Place the container in the freezer, ideally towards the back where the temperature is more consistent, to keep the ice cream at its best quality.
When storing the Bubblegum Ice Cream, make sure to label the container with the date it was made to keep track of freshness. If you have added gumballs or any other decorations, consider removing them before storing the ice cream as they may become hard or lose their texture in the freezer. When ready to enjoy the ice cream again, allow it to sit at room temperature for a few minutes to soften slightly before scooping. By following these storage tips, you can continue to enjoy the delightful flavor and festive appeal of the Bubblegum Ice Cream for days to come.
Ingredient Substitutions
If you’re looking to make a lighter version of this bubblegum ice cream, you can substitute the heavy cream with half-and-half or a combination of milk and Greek yogurt for a creamier texture without all the richness. This adjustment can help reduce the overall fat content while still maintaining a creamy consistency.
For a dairy-free alternative, you can use coconut cream or almond milk in place of the heavy cream and whole milk. This swap will give the ice cream a subtle coconut or nutty flavor, adding a unique twist to the bubblegum taste. Make sure to adjust the sugar amount accordingly based on the sweetness of your non-dairy milk substitute.
If you prefer a natural coloring option or want to avoid using food coloring, you can try adding a small amount of beet juice or raspberry puree for a pink hue. These natural alternatives can still achieve a lovely pink color without the need for artificial dyes. Just be mindful of the additional liquid added and adjust the recipe as needed to maintain the ice cream’s creamy consistency.
Serving Suggestions
For a fun and whimsical presentation of this bubblegum ice cream, consider serving it in mini ice cream cones topped with colorful gumballs. This not only enhances the playful aesthetic of the dessert but also adds a delightful crunch and burst of extra bubblegum flavor with each bite. The vibrant pink hue against the white ice cream and the assorted sprinkles create a visually appealing treat that’s perfect for kids’ parties or nostalgic gatherings.
To elevate the presentation for a more adult-friendly setting, serve scoops of the bubblegum ice cream in elegant glass dessert bowls garnished with a sprinkle of confetti sprinkles and a drizzle of white chocolate sauce. This sophisticated twist on a childhood favorite brings a touch of whimsy to dinner parties or special celebrations, appealing to the inner child in all your guests while still maintaining a sense of refined indulgence.
FAQs for Delicious Homemade Bubblegum Ice Cream Recipe
Can I substitute the bubblegum flavoring with another extract?
It’s best to stick with bubblegum flavoring for the authentic taste of bubblegum ice cream. Substituting with another extract may alter the nostalgic flavor this recipe aims to capture.
Can I use low-fat milk instead of whole milk?
Whole milk provides a creamier texture and richer flavor to the ice cream. Using low-fat milk may result in a less creamy consistency and could affect the overall taste of the bubblegum ice cream.
Can I omit the food coloring and still achieve a vibrant pink color?
The pink or red food coloring is essential for achieving the vibrant pink color characteristic of bubblegum ice cream. Omitting it may result in a different color that doesn’t capture the fun and nostalgic appeal of this dessert.
How can I prevent the gumballs from becoming too hard in the ice cream?
To prevent the gumballs from becoming too hard, you can add them as a topping just before serving rather than mixing them into the ice cream during the churning process. This way, they retain their texture and are easier on the teeth when enjoying the ice cream.
Conclusion
As you whip up a batch of this delightful Bubblegum Ice Cream for your next gathering, remember that sometimes the simplest recipes can create the biggest smiles. Whether it’s a birthday party, a summer BBQ, or just a special treat for your loved ones, this vibrant pink ice cream is sure to be a hit. The nostalgic bubblegum flavor has a way of bringing out the kid in everyone, making it a perfect choice for any occasion that calls for a touch of fun and whimsy.
So go ahead, indulge in a scoop (or two) of this Bubblegum Ice Cream and savor the moments of pure joy it brings. Whether you’re serving it up in a cone with extra gumballs on top or getting creative with different flavor variations, this playful dessert is bound to be a crowd-pleaser. Let the magic of this nostalgic treat transport you back to the carefree days of childhood, even if just for a sweet and delicious moment. Enjoy every spoonful of this delightful Bubblegum Ice Cream and create memories that will last a lifetime.
Delicious Homemade Bubblegum Ice Cream Recipe
Indulge in the nostalgia of childhood with this vibrant Bubblegum Ice Cream, a festive treat loved by kids and adults alike.
Prep Time15 Minutes
Cook Time20 Minutes
Total Time35 Minutes
CuisineAmerican
Skill LevelEasy
Servings6 Servings (1 quart)
Ingredients
Ice Cream Base
- Pink or red food coloring (to taste)
- ¾ cup granulated sugar
- 2 teaspoons bubblegum flavoring
- 1 teaspoon vanilla extract
- 2 cups heavy cream
- ¼ teaspoon kosher salt
- 1 cup whole milk
Mix-ins and Toppings
- ½ cup confetti sprinkles, divided
- 1 cup gumballs (for decoration)
Instructions
-
Prepare Ice Cream Maker: Freeze the ice cream maker bowl for a minimum of 24 hours before churning to ensure proper freezing.
-
Mix the Base: Combine heavy cream, whole milk, granulated sugar, bubblegum flavoring, vanilla extract, and kosher salt in a large mixing bowl. Whisk for 2-3 minutes until sugar is dissolved.
-
Add Color: Gradually add a few drops of pink or red food coloring to the mixture, stirring well after each addition until your desired shade of pink is reached. Note that the color will lighten once frozen.
-
Chill the Mixture: For optimal results, cover the bowl with plastic wrap and refrigerate the mixture for at least 1 hour or overnight. This step, although optional, enhances the flavors and texture.
-
Churn the Ice Cream: Transfer the chilled mixture to the ice cream maker and churn as per the manufacturer’s guidelines, typically for 20-25 minutes or until it reaches a soft-serve consistency.
-
Add Sprinkles: In the final 2 minutes of churning, add the majority of the confetti sprinkles, reserving 1 tablespoon for garnishing. Mix until evenly distributed.
-
Transfer to Container: Transfer the churned ice cream to a shallow container or loaf pan, smooth the top with a spatula, and sprinkle the reserved confetti sprinkles on top.
-
Freeze Until Firm: Place plastic wrap directly on the surface of the ice cream in the container to prevent ice crystals. Freeze for a minimum of 4 hours until firm.
-
Serve: Allow the ice cream to soften at room temperature for approximately 5 minutes. Top with colorful gumballs for a fun decoration that can be eaten with the ice cream or separately.