Follow Me On Social Media!
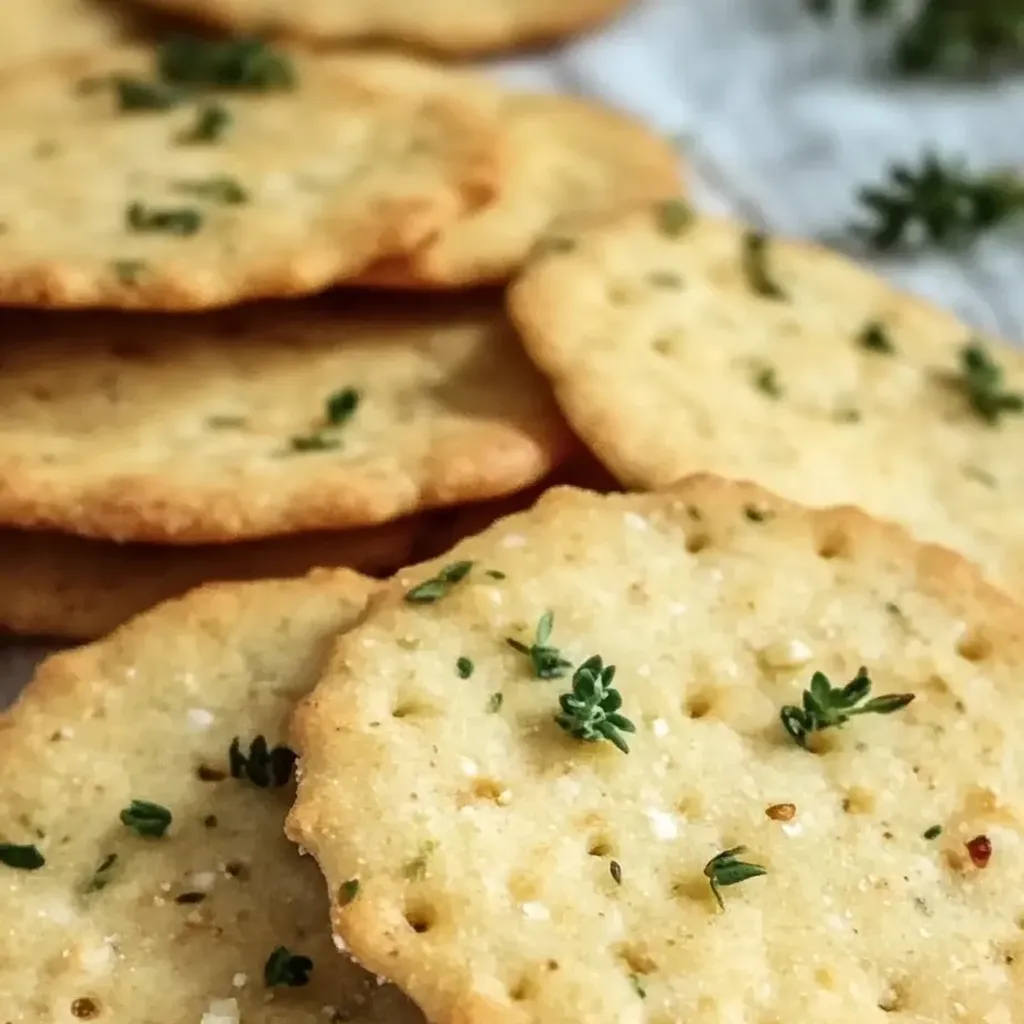
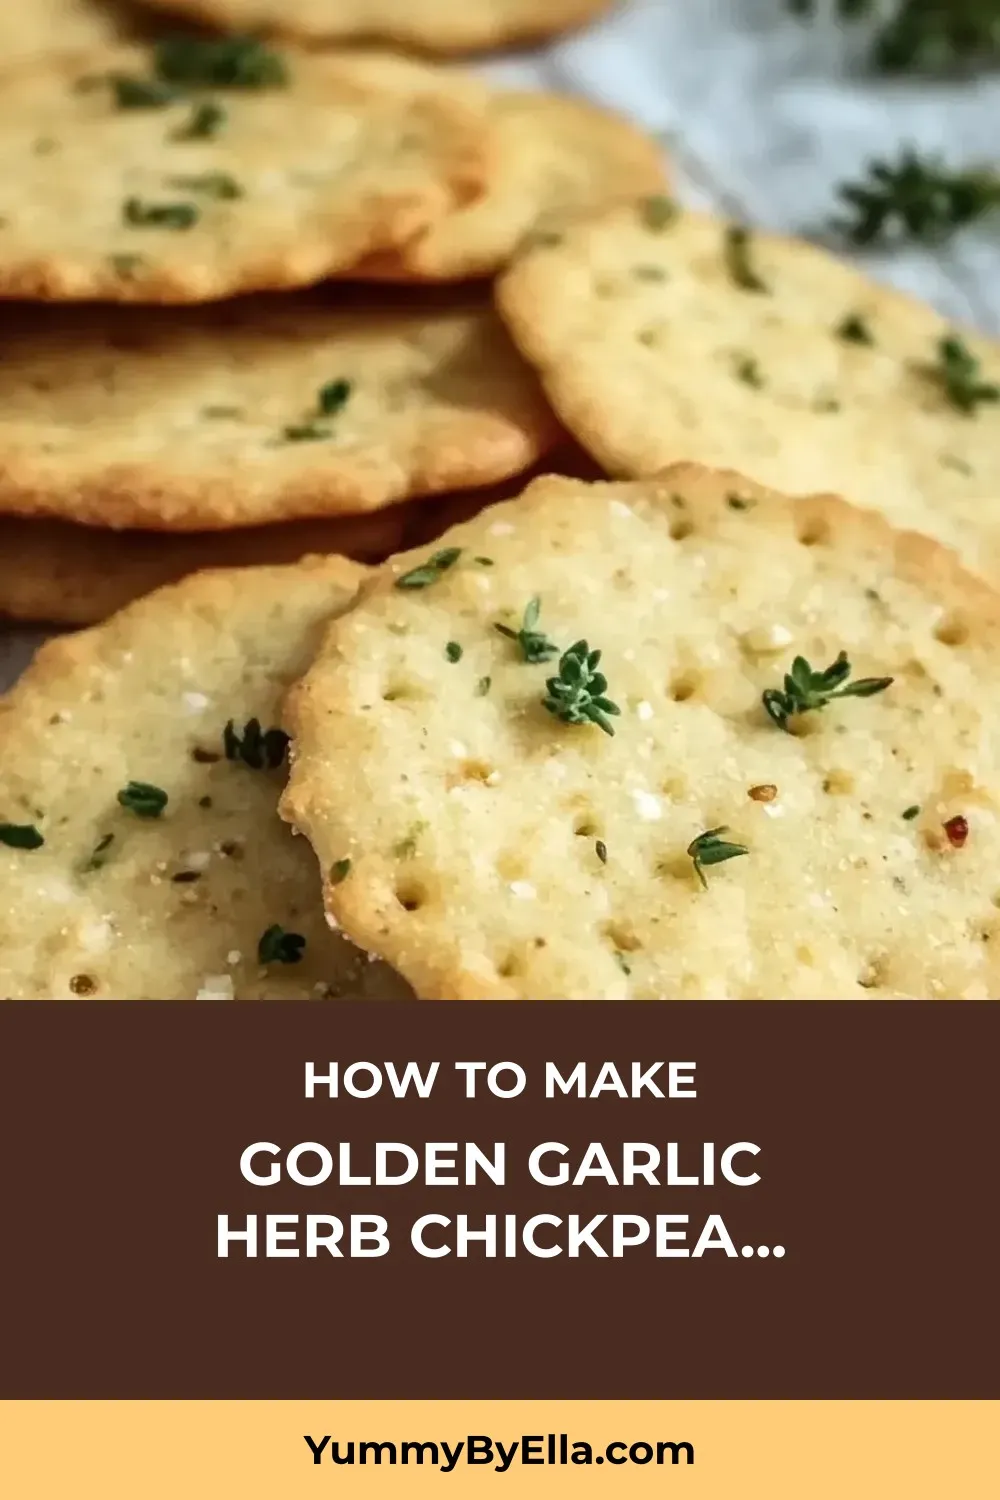
Looking for a snack that’s not only delicious but also guilt-free? Look no further than these flavorful Garlic and Herb Chickpea Flour Snack Crackers! I stumbled upon this recipe during my quest for healthier snack options, and it has since become a staple in my kitchen. The combination of savory herbs, nutty chickpea flour, and aromatic garlic creates a cracker that rivals those found in specialty shops but at a fraction of the cost.
The aroma of garlic and herbs wafting through my kitchen never fails to entice friends and family. From my neighbor who couldn’t resist a taste to my teenage son requesting them for study group snacks, these crackers have won over even the pickiest eaters. These versatile crackers pair perfectly with hummus, cheese, or hearty dips, making them ideal for snacking, entertaining, or even elevating a simple soup and salad lunch.
With endless possibilities for customization, such as adding smoked paprika or swapping out herbs for different flavors, these Garlic and Herb Chickpea Flour Snack Crackers are sure to become a favorite in your home too. Join me in savoring the satisfaction of creating something truly special from humble ingredients, one crunchy bite at a time.
Quick Benefits
- Healthier alternative to store-bought crackers, made with simple, wholesome ingredients
- Bursting with savory garlic and herb flavors that elevate the snack experience
- Versatile snack option perfect for pairing with dips, cheeses, or enjoying on its own
- Easy to customize with additional seasonings like smoked paprika or everything bagel seasoning
Why You’ll Love This Golden Garlic Herb Chickpea Flour Crackers Recipe
- Delicious and Savory Flavor Profile: The combination of garlic, herbs, and chickpea flour creates a flavorful and aromatic cracker that tastes better than store-bought options.
- Healthier Snacking Option: Made with chickpea flour and olive oil, these crackers are a wholesome alternative to processed snacks, making you feel good about what you’re eating.
- Cost-Effective: Enjoy gourmet-quality crackers at a fraction of the cost of specialty store-bought versions, perfect for those looking to save money without compromising on taste.
- Versatile Serving Options: Pair these crackers with hummus, cheeses, dips, or enjoy them on their own for a satisfying snack suitable for various occasions and preferences.
- Family and Crowd Pleaser: Loved by teenagers, picky eaters, and adults alike, these crackers are sure to be a hit with friends and family, making them an excellent choice for gatherings or everyday snacking.
- Customizable and Adaptable: With options to add different spices, seasonings, or even cheese, you can personalize the recipe to suit your taste preferences and create unique variations.
- Easy to Make and Share: Whip up a batch of these crackers in no time, and watch them disappear quickly as they are a convenient snack for on-the-go, lunches, study groups, or to share with loved ones.
- Homemade Goodness: Experience the satisfaction of creating something delicious from scratch with simple ingredients, a rewarding and fulfilling activity for home cooks of all levels.
Ingredients for Golden Garlic Herb Chickpea Flour Crackers
Cracker Dough
- 1 teaspoon garlic powder
- ½ cup water, about 120ml
- 2 tablespoons olive oil
- ¼ teaspoon black pepper
- 1 cup chickpea flour (besan), about 120g
- ½ teaspoon salt
- 1 teaspoon dried mixed herbs (such as rosemary, thyme, oregano)
Optional Toppings
- Additional dried herbs
- Flaky sea salt
- Extra olive oil for brushing
- Sesame seeds
How to Make Golden Garlic Herb Chickpea Flour Crackers
Step 1: Preheat and Prepare
Preheat oven to 350°F (175°C) with rack in the middle. Line baking sheet with parchment paper, leaving overhang for easy removal.
Step 2: Mix Dry Ingredients
In a medium mixing bowl, whisk together chickpea flour, dried mixed herbs, garlic powder, salt, and black pepper until well combined. Ensure there are no clumps in the chickpea flour.
Step 3: Add Wet Ingredients
Make a well in the dry ingredients, then add olive oil and half of the water. Stir while gradually adding the rest of the water until a smooth dough forms.
Step 4: Adjust Consistency
Adjust dough consistency by adding water gradually if dry or chickpea flour if wet, aiming for a firm yet pliable texture resembling play-dough.
Step 5: Knead Briefly
Transfer the dough onto a clean surface sprinkled with chickpea flour. Knead gently for approximately 30 seconds until smooth and slightly tacky without sticking to your fingers.
Step 6: Roll Out the Dough
Sandwich the dough between two sheets of parchment paper to prevent sticking. Roll out the dough to about ⅛ inch (3mm) thickness using a rolling pin, ensuring an even thickness.
Step 7: Score the Dough
Peel off the top sheet of parchment paper and score the dough into desired cracker shapes using a pizza cutter, sharp knife, or pastry wheel.
Step 8: Add Optional Toppings
Optionally, brush the surface lightly with water or olive oil and sprinkle with toppings such as sesame seeds, flaky sea salt, or dried herbs. Gently press to ensure the toppings stick to the dough.
Step 9: Bake to Perfection
Place the parchment paper with the scored dough on a baking sheet. Bake in the preheated oven for 15-20 minutes, checking at 12 minutes. The crackers should turn golden-brown on the edges and feel firm.
Step 10: Cool Properly
Take the baking sheet out of the oven and let the crackers cool completely on the sheet. For extra crispness, after baking, turn off the oven, crack the door open, and leave the crackers inside for 10-15 more minutes.
📌 Pin for later!
Step 11: Break and Store
After the crackers have cooled completely, break them along the score lines and store in an airtight container at room temperature for up to one week.
Storage Tips
Once you have baked and cooled the garlic and herb chickpea flour crackers, it’s important to store them properly to maintain their freshness and crunchiness. To keep the crackers crispy, store them in an airtight container at room temperature. Make sure the container is sealed tightly to prevent moisture from softening the crackers.
If you live in a humid climate or want to extend the shelf life of the crackers, you can add a small piece of bread or a silica gel packet to the container. These will help absorb any excess moisture and keep the crackers crunchy for a longer period.
To enhance the flavors of the crackers even further, you can store them alongside a small piece of cheese or a sprig of fresh herbs in the container. This will allow the crackers to absorb the aromas and develop a more complex taste over time. Enjoy these homemade crackers within a week for the best flavor and texture, and be sure to share them with family and friends to spread the joy of homemade snacks.
Ingredient Substitutions
If you don’t have chickpea flour on hand, you can substitute it with other gluten-free flours like almond flour or a gluten-free all-purpose flour blend. Keep in mind that the flavor and texture may vary slightly, but the crackers will still be delicious. Additionally, if you prefer a different oil or are looking to enhance the flavor profile, you can replace the olive oil with melted coconut oil or melted butter for a richer taste.
For a different herb and spice combination, feel free to customize the recipe to your preferences. You can swap out the dried mixed herbs for fresh herbs like chopped rosemary, thyme, or parsley for a more vibrant flavor. Experiment with different spices such as cumin, smoked paprika, or chili flakes to add a unique twist to the crackers. Remember to adjust the quantities based on your taste preferences and enjoy creating a personalized version of these flavorful homemade crackers.
Serving Suggestions
These Garlic and Herb Chickpea Flour Snack Crackers are incredibly versatile and can be served in various creative ways. For a light and healthy snack, pair them with classic hummus or creamy baba ganoush. The nutty flavor of the crackers complements the dips perfectly, offering a satisfying crunch with every bite.
If you’re hosting a gathering, create a beautiful cheese board featuring these crackers alongside soft cheeses like goat cheese or brie. Their sturdy texture makes them ideal for pairing with a variety of cheeses and spreads. Enhance the flavor profile by sprinkling sesame seeds and flaky sea salt on top of the crackers before serving to add an extra layer of texture and taste. Your guests will be impressed by the gourmet touch these homemade crackers bring to the table.
FAQs for Golden Garlic Herb Chickpea Flour Crackers
Can I substitute chickpea flour with another type of flour?
Chickpea flour has a unique nutty flavor and is essential for the taste and texture of these crackers. Substituting it with another flour may alter the final result significantly. It’s best to use chickpea flour for this specific recipe.
How can I store these crackers to keep them fresh?
Once completely cooled, store the crackers in an airtight container at room temperature. They should stay fresh for up to a week. If you live in a humid climate and the crackers start to lose their crispness, you can crisp them up in a low oven for a few minutes before serving.
Can I freeze the dough or the baked crackers for later use?
Yes, you can freeze both the dough and the baked crackers. To freeze the dough, wrap it tightly in plastic wrap and place it in a freezer bag. Thaw in the refrigerator before rolling out and baking. Baked crackers can be frozen in a single layer, then transferred to a freezer bag once fully frozen. Reheat in a low oven to restore crispness.
Can I adjust the seasoning in this recipe to suit my taste preferences?
Absolutely! Feel free to adjust the amount of garlic, herbs, salt, or pepper to suit your taste preferences. You can also experiment with different herbs and spices to create your own unique flavor combinations. The recipe is quite versatile and allows for personalization.
Conclusion
As you embark on your culinary journey with these delightful Garlic and Herb Chickpea Flour Snack Crackers, remember that the beauty of homemade snacks lies not just in their delicious flavors but also in the joy of creating something wholesome and satisfying with your own hands. Whether you savor these crackers solo, pair them with your favorite dips, or share them with loved ones, each bite carries the essence of care and creativity that went into making them.
Embrace the versatility of this recipe by experimenting with different herbs and spices to suit your taste preferences. Whether you opt for a smoky twist with smoked paprika or a cheesy indulgence with parmesan, let your imagination guide you in elevating these simple crackers into a snack that speaks to your unique palate. Let the aroma of garlic and herbs fill your kitchen once more as you embark on another batch of these addictive homemade treats. Happy snacking, and may your kitchen always be filled with the warmth of good food and good company.
📌 Pin for later!
Golden Garlic Herb Chickpea Flour Crackers
“Transform humble chickpea flour into savory Garlic and Herb crackers that rival expensive gourmet snacks – simple, flavorful, and irresistible.”
Prep Time20 Minutes
Cook Time45 Minutes
Total Time65 Minutes
CuisineMediterranean
Skill LevelEasy
Servings6 Servings (About 24 crackers)
Ingredients
Cracker Dough
- 1 teaspoon garlic powder
- ½ cup water, about 120ml
- 2 tablespoons olive oil
- ¼ teaspoon black pepper
- 1 cup chickpea flour (besan), about 120g
- ½ teaspoon salt
- 1 teaspoon dried mixed herbs (such as rosemary, thyme, oregano)
Optional Toppings
- Additional dried herbs
- Flaky sea salt
- Extra olive oil for brushing
- Sesame seeds
Instructions
-
Preheat and Prepare: Preheat oven to 350°F (175°C) with rack in the middle. Line baking sheet with parchment paper, leaving overhang for easy removal.
-
Mix Dry Ingredients: In a medium mixing bowl, whisk together chickpea flour, dried mixed herbs, garlic powder, salt, and black pepper until well combined. Ensure there are no clumps in the chickpea flour.
-
Add Wet Ingredients: Make a well in the dry ingredients, then add olive oil and half of the water. Stir while gradually adding the rest of the water until a smooth dough forms.
-
Adjust Consistency: Adjust dough consistency by adding water gradually if dry or chickpea flour if wet, aiming for a firm yet pliable texture resembling play-dough.
-
Knead Briefly: Transfer the dough onto a clean surface sprinkled with chickpea flour. Knead gently for approximately 30 seconds until smooth and slightly tacky without sticking to your fingers.
-
Roll Out the Dough: Sandwich the dough between two sheets of parchment paper to prevent sticking. Roll out the dough to about ⅛ inch (3mm) thickness using a rolling pin, ensuring an even thickness.
-
Score the Dough: Peel off the top sheet of parchment paper and score the dough into desired cracker shapes using a pizza cutter, sharp knife, or pastry wheel.
-
Add Optional Toppings: Optionally, brush the surface lightly with water or olive oil and sprinkle with toppings such as sesame seeds, flaky sea salt, or dried herbs. Gently press to ensure the toppings stick to the dough.
-
Bake to Perfection: Place the parchment paper with the scored dough on a baking sheet. Bake in the preheated oven for 15-20 minutes, checking at 12 minutes. The crackers should turn golden-brown on the edges and feel firm.
-
Cool Properly: Take the baking sheet out of the oven and let the crackers cool completely on the sheet. For extra crispness, after baking, turn off the oven, crack the door open, and leave the crackers inside for 10-15 more minutes.
-
Break and Store: After the crackers have cooled completely, break them along the score lines and store in an airtight container at room temperature for up to one week.