Follow Me On Social Media!
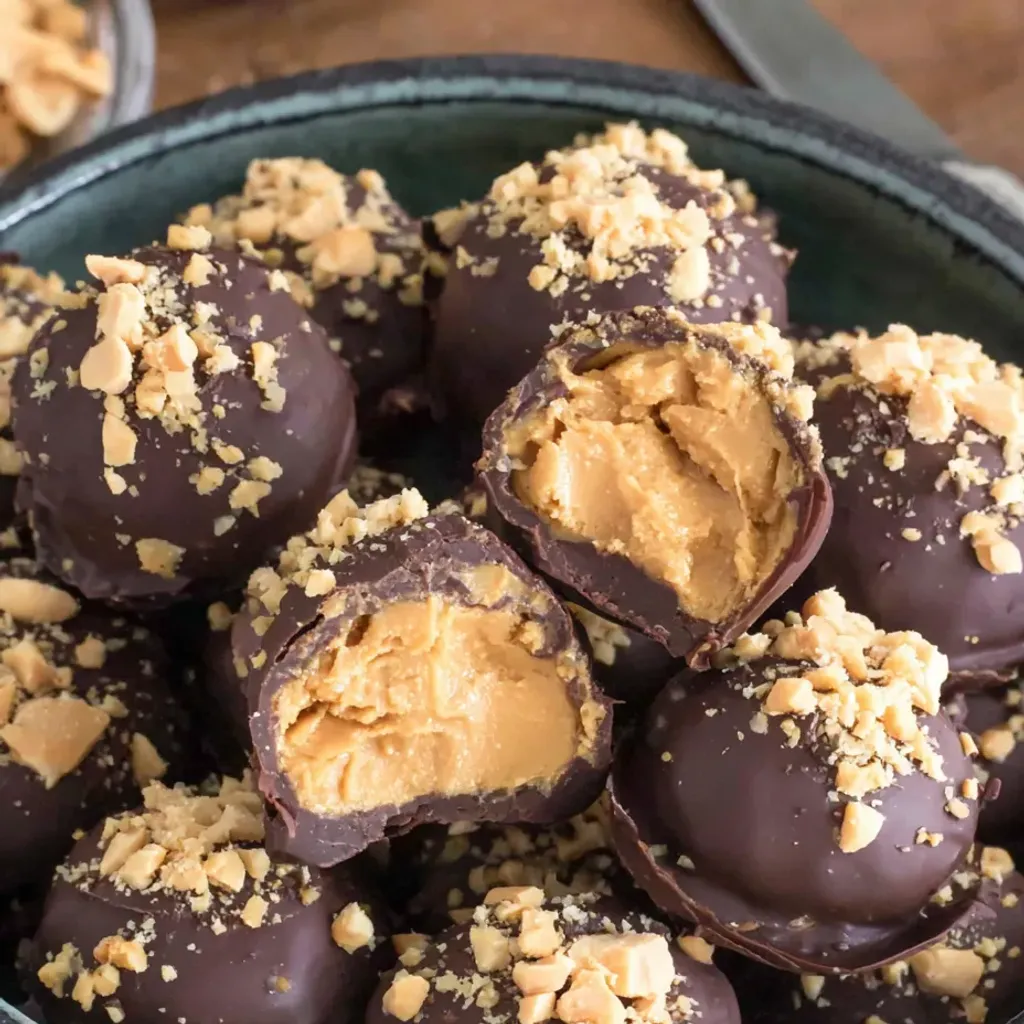
If you’re looking for a delectable treat that combines the irresistible flavors of peanut butter and chocolate, look no further than Peanut Butter Balls. These homemade goodies are like a personalized version of Reese’s cups, but without the hassle of dealing with pesky wrappers. By mixing creamy peanut butter with butter and powdered sugar, you create a delightful cookie dough-like mixture that forms the heart of these delectable spheres. Once chilled, rolled, and dipped in melted chocolate, these Peanut Butter Balls become a true crowd-pleaser that’s perfect for any occasion.
I stumbled upon this recipe when my daughter’s school imposed a ban on homemade baked goods for class parties, except for “no-bake items.” These Peanut Butter Balls quickly became a hit, with kids devouring them at lightning speed. The process of making them is surprisingly easy, with just a bit of mixing and dipping involved. Even my friend Jessica, who claimed she lacked the skill for precision in cooking, found success in making these after a little encouragement. The combination of the snap of the chocolate shell and the creamy peanut butter center is simply irresistible, making these treats a must-have for any gathering. So, whether you’re catering to a school function or simply satisfying your sweet tooth, Peanut Butter Balls are sure to impress with their homemade charm and delicious taste.
Quick Benefits
- Control over ingredient amounts for personalized taste
- Easy no-bake recipe with minimal hands-on time
- Perfect balance of creamy peanut butter and hard chocolate shell
- Impressive and professional-looking result for any event
Why You’ll Love This Irresistible Peanut Butter Energy Bites Recipe
- You get to customize the amount of peanut butter in each ball, allowing you to tailor the taste to your preference.
- These peanut butter balls eliminate the hassle of dealing with paper wrappers, making them more convenient than store-bought candy.
- The recipe is straightforward and doesn’t require advanced baking skills, making it accessible to even beginners in the kitchen.
- The contrast between the crunchy dark chocolate shell and the creamy, salty-sweet peanut butter center creates a satisfying flavor and texture experience.
- They are the perfect treat for school events, holiday parties, or any gathering, as they look impressively professional despite being easy to make.
- Once you master the chilling and dipping technique, you’ll find yourself making these peanut butter balls repeatedly, becoming a popular treat among friends and family.
Ingredients for Irresistible Peanut Butter Energy Bites
For the Peanut Butter Filling
- 1 cup creamy peanut butter
- 8 tbsp unsalted butter, at room temperature
- 2 cups powdered sugar
For the Chocolate Coating
- 2 cups dark chocolate melting wafers
- ¼ cup crushed peanuts for topping (optional)
How to Make Irresistible Peanut Butter Energy Bites
Step 1: Mix the Base
In a large bowl, combine softened butter and peanut butter. Use an electric mixer to beat until smooth and creamy, about 1-2 minutes.
Step 2: Add the Sugar
Mix in the powdered sugar until well combined to form a thick cookie dough-like mixture. Chill the bowl in the fridge for 1 hour to firm up.
Step 3: Shape the Balls
Remove the mixture from the refrigerator and shape into 1-inch balls. Arrange on a baking sheet and freeze for 1 to 2 hours until firm.
Step 4: Melt the Chocolate
Follow the package instructions to melt the chocolate wafers. Allow the melted chocolate to cool slightly before using.
Step 5: Dip and Decorate
Dip each frozen peanut butter ball into melted chocolate using a fork, allowing excess chocolate to drip off. Place back on baking sheet and sprinkle with crushed peanuts, if desired. Alternatively, use a toothpick or spoon for dipping.
Step 6: Let Them Set
Allow the chocolate to fully harden before serving. To expedite this process, return them to the refrigerator for approximately 15 minutes.
Storage Tips
Once you have made these delightful Peanut Butter Balls, you’ll want to store them properly to maintain their freshness and texture. To store the finished peanut butter balls, place them in an airtight container in a single layer, separating each layer with parchment paper to prevent sticking. Keep the container in the refrigerator for up to 2 weeks, allowing the chocolate shell to stay firm and the peanut butter filling to remain creamy.
If you want to store the peanut butter balls for a longer period, you can freeze them. Place the dipped peanut butter balls on a baking sheet lined with parchment paper and freeze them until solid. Once frozen, transfer the peanut butter balls to a freezer-safe container or resealable bag with parchment paper between the layers. They can be stored in the freezer for up to 2-3 months. When ready to enjoy, let them thaw in the refrigerator for a few hours before serving. Whether stored in the fridge or freezer, these homemade treats will be a convenient and delicious sweet treat to have on hand for any occasion.
Ingredient Substitutions
For a potential ingredient substitution in this Peanut Butter Balls recipe, you can try using almond butter or any other nut butter in place of peanut butter for a different flavor profile. The creamy consistency of almond butter can provide a similar texture to the peanut butter, creating a delicious alternative for those with peanut allergies or looking for a different taste experience.
If you prefer a healthier option, consider substituting the unsalted butter with coconut oil. Coconut oil can add a subtle coconut flavor to the Peanut Butter Balls while maintaining the necessary fat content for binding the ingredients together. This substitution can also make the recipe dairy-free if needed, catering to dietary restrictions or preferences. Remember to adjust the amount of coconut oil used to achieve the desired consistency in the mixture.
Serving Suggestions
For a fun twist on serving these delicious peanut butter balls, try skewering them on small lollipop sticks to create peanut butter ball pops. Not only does this presentation make them easier to grab and enjoy at parties, but it also adds a playful touch that both kids and adults will love. You can even drizzle some extra melted chocolate on top of the balls before they fully set to create a decorative swirl effect.
Another creative way to serve these peanut butter balls is by crushing some pretzels into small pieces and mixing them with the crushed peanuts before sprinkling them on top of the chocolate-coated balls. The combination of salty pretzels and crunchy peanuts adds a delightful texture contrast to the creamy peanut butter center, elevating the overall flavor profile of the treats. Plus, the added visual appeal of the pretzel-peanut topping will make these homemade candies look even more enticing on any dessert platter.
FAQs for Irresistible Peanut Butter Energy Bites
Can I use natural peanut butter instead of creamy peanut butter?
It’s best to use creamy peanut butter for this recipe as it provides the right texture and consistency for the peanut butter balls. Natural peanut butter tends to be more runny and may not hold up well in the mixture.
Can I substitute the dark chocolate melting wafers with milk chocolate?
Yes, you can definitely use milk chocolate melting wafers if you prefer a sweeter taste. Feel free to customize the chocolate coating based on your preference.
How should I store the peanut butter balls?
Once the peanut butter balls are fully set and the chocolate coating has hardened, store them in an airtight container in the refrigerator. They can be kept for up to 2 weeks, but they are best enjoyed within the first few days for the freshest taste and texture.
Can I freeze the peanut butter balls for a longer period?
Absolutely! If you want to make a large batch or prepare them ahead of time, you can freeze the peanut butter balls after they have been dipped in chocolate. Simply place them on a baking sheet in a single layer until frozen solid, then transfer them to a freezer-safe container or bag. Thaw them in the refrigerator before serving.
Conclusion
In conclusion, Peanut Butter Balls are a delightful treat that never fails to impress. Whether you’re making them for a school function, a holiday party, or just as a special homemade treat, these little spheres of joy are sure to be a hit. The process may seem daunting at first, but trust me when I say that the end result is well worth the effort. The creamy peanut butter center encased in a rich chocolate shell is a match made in dessert heaven.
So don’t be intimidated by the idea of making Peanut Butter Balls – give them a try and discover the joy of creating these delicious treats yourself. Who knows, you might just find yourself becoming as popular as I am with those demanding second graders! Embrace the simple pleasure of making these no-bake wonders and share the love of Peanut Butter Balls with your friends and family. Happy baking!
Irresistible Peanut Butter Energy Bites
Homemade peanut butter balls with a creamy, salty-sweet center and a dark chocolate shell – a no-bake treat that’s both easy and impressive.
Prep Time30 Minutes
Cook Time~ undefined
Total Time30 Minutes
CuisineAmerican
Skill LevelEasy
Servings20 Servings (20 balls)
Ingredients
For the Peanut Butter Filling
- 1 cup creamy peanut butter
- 8 tbsp unsalted butter, at room temperature
- 2 cups powdered sugar
For the Chocolate Coating
- 2 cups dark chocolate melting wafers
- ¼ cup crushed peanuts for topping (optional)
Instructions
-
Mix the Base: In a large bowl, combine softened butter and peanut butter. Use an electric mixer to beat until smooth and creamy, about 1-2 minutes.
-
Add the Sugar: Mix in the powdered sugar until well combined to form a thick cookie dough-like mixture. Chill the bowl in the fridge for 1 hour to firm up.
-
Shape the Balls: Remove the mixture from the refrigerator and shape into 1-inch balls. Arrange on a baking sheet and freeze for 1 to 2 hours until firm.
-
Melt the Chocolate: Follow the package instructions to melt the chocolate wafers. Allow the melted chocolate to cool slightly before using.
-
Dip and Decorate: Dip each frozen peanut butter ball into melted chocolate using a fork, allowing excess chocolate to drip off. Place back on baking sheet and sprinkle with crushed peanuts, if desired. Alternatively, use a toothpick or spoon for dipping.
-
Let Them Set: Allow the chocolate to fully harden before serving. To expedite this process, return them to the refrigerator for approximately 15 minutes.